• Skip to primary navigation
  • Skip to main content
  • Skip to primary sidebar
  • Skip to secondary sidebar
  • Home
  • About me

The Constant Scrapper

If I'm not scrapbooking I'm thinking about scrapbooking!

Layouts based on sketches

The subtle science and exact art of letter writing

May 5, 2011 By Janice Daquila-Pardo 8 Comments

While I didn’t get up at an obscene hour last Friday to watch the royal wedding, I’m a romantic, so I did follow along throughout the day watching and reading about it.

Everything was beautifully orchestrated and everyone was gorgeous. But it wasn’t the spectacle of the event that drew me so much as the opportunity to immerse myself in this great celebration of love. Who among us can see a couple like William and Catherine, young and in love, and not feel our hearts swell?

How often do we have the opportunity to share a grand display of love? Well, certainly shutting down an entire country’s economy for the day and globally televising our declarations of love aren’t in the cards for most of us, but there is a small yet very meaningful gesture available to us any day. It’s the love letter.

Watching William and Catherine vow to love and honor each other all the days of their lives made me itchy to share some mushy sentiments with my husband.

Advice for the love(letter)lorn

But have you attempted to write a love letter? It’s daunting trying to translate those kinds of emotions into words! We can’t all be Victor Hugo:
“My adorable and adored: I have been asking myself every moment if such happiness is not a dream. It seems to me that what I feel is not of earth. I cannot yet comprehend this cloudless heaven. My whole soul is yours…”

Wow, would I love to be able to write this way! Fortunately, there are people through the ages who have excelled at just that. We all like to take inspiration from other artists’ work, so let’s take a look at a few resources that showcase letter-writing artists:

  • http://www.romantic-ideas-online.com/famous-love-letters.html
  • http://loveletterscentral.com/
  • http://www.theromantic.com/LoveLetters/main.htm

Perhaps these wonderful love letters—of all styles—can help start your words flowing. Keep in mind, though, that the most important element of a good love letter is that it contain honest words from your heart. The rest is gravy.

Of course, my medium of choice for this billet-doux was a scrapbook layout. Although my words are not going to go down in the history books for their style, my hope is that the substance will be always inked on Matt’s heart.
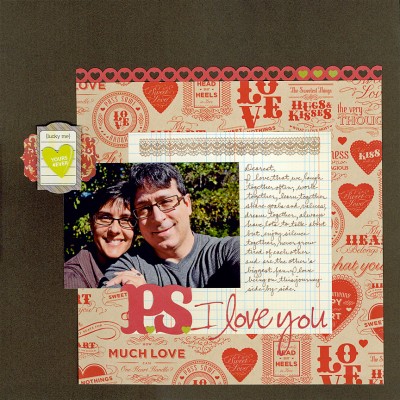
PSILoveYou_JDaquila-Pardo

This love letter to my husband is meant to remind him of what I cherish about us.

Filed Under: Layouts based on sketches, My scrapbook layouts Tagged With: 1 photo, border punches, emotional journaling, one-page layouts, Silhouette, stamping

How can you resist?

April 27, 2011 By Janice Daquila-Pardo 7 Comments

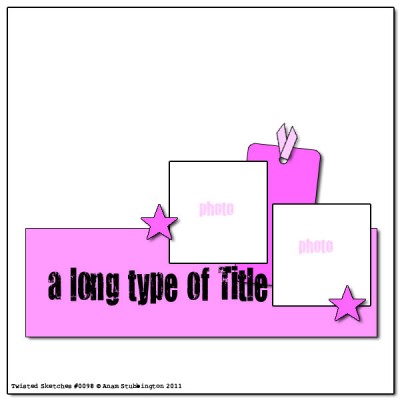
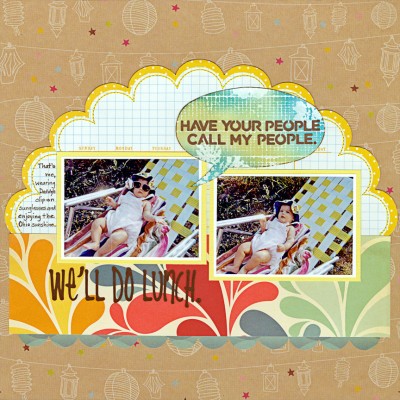
Twisted Sketches launches its 98th sketch today, and the twist this time is “paint.” The sketch and the design team’s interpretations are awaiting you at Twisted Sketches’ site…and here is my design team contribution using the new sketch:

We'llDoLunch_Daquila-Pardo

That's me, wearing Daddy's clip-on sunglasses and enjoying the Ohio sunshine.

This is the sketch:

6a00d83451d2c069e20147e3cc26c9970b-800wi

Twisted Sketch #98 calls for 2 photos

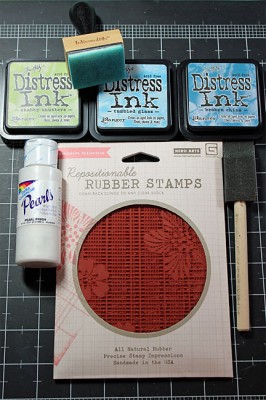
For the “paint” twist I was inspired to try a resist technique on the talk bubble using white shimmer paint. I have done resist techniques with ink and embossing powder before but had not yet tried paint resist, so I thought I would show a quick step-by-step just in case it might inspire you to try it on a future layout.

  1. Gather your supplies: Acrylic paint, rubber stamp, Distress Inks and foam applicators.

    PaintResistSupplies

    This technique doesn't take much in the way of supplies.

  2. Apply paint (shimmer paint in my example) to the stamp image and stamp it carefully (don’t smear it) on a spare bit of cardstock.
  3. Immediately take your rubber stamp to a sink and clean it well with soap and water. It’s best not to let the acrylic paint dry on the stamp as it may be harder to remove.
  4. If you’re patient wait until the paint thoroughly dries. If not, hit it with your heat tool for a minute or two.
  5. Start applying the Distress Inks with a circular motion and blend your colors a little where they meet. I used the three colors shown in the photo, but of course there are no rules about how many you use.
  6. Slightly mist a paper towel with water and gently buff off the extra ink from the painted areas to reveal the true color!

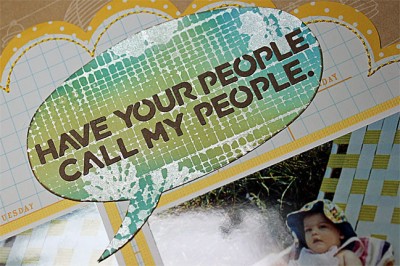
Here is a close-up of the final effect. I think I like it!

CloseUp

This close-up photo shows how the shimmer paint resisted the inks.

If you decide to try this quick technique after reading my post, have your people call my people please leave a comment and a link so I can see what you’ve done!

Filed Under: Layouts based on sketches, My scrapbook layouts, Sketches, Tutorials Tagged With: 2 photos, American Crafts, Basic Grey, Blogging for Scrapbookers class, border punches, October Afternoon, one-page layouts, Silhouette, stamping, tutorial, Twisted Sketches, vintage photos

Spanning a score of years

April 19, 2011 By Janice Daquila-Pardo Leave a Comment

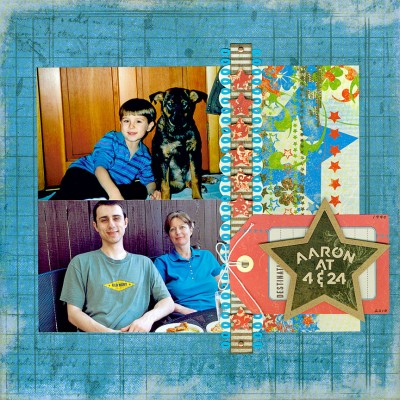
I really appreciate the layouts I see that compare people at different times in their life. So I pulled out two photos of Matt’s nephew, Aaron, at the ages of 4 and 24 and got to work on a layout to compare them.

The hardest part about this layout for me was finding products that would work well for both times in a boy’s life. But once I did, the sketch I found on shimelle.com helped it all come together. Following is the resulting layout as well as the sketch.

Aaron4&24_JDaquila-Pardo

Aaron at 4 & 24: A boy grows into a man

The sketch calls for one large or two smaller photos and lots of attention on the border.

Filed Under: Layouts based on sketches, My scrapbook layouts Tagged With: 2 photos, border punches, one-page layouts, Spellbinders, vintage photos

My Fortress of Scraptitude

April 12, 2011 By Janice Daquila-Pardo 4 Comments

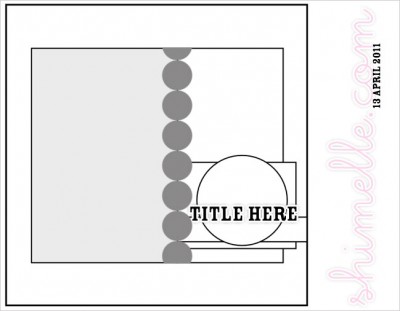
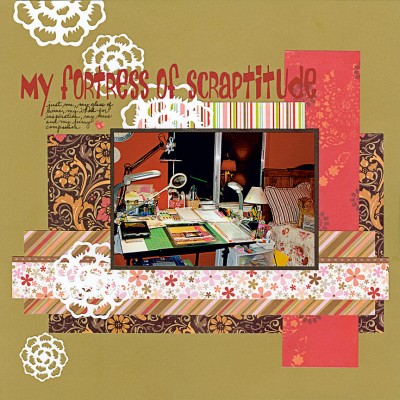
I was scrapping this weekend and decided to take a photo of the project/mess on my craft table and turn it into a layout. I’ll admit that I was nudged into doing this because of Kristina Werner’s cute post a while back, 90% of real crafters make real messes, where she challenged crafters to “own” the messes we make. (My layout is based on one of Shimelle’s recent sketches.)

FortressOfScraptitude_JDaquila-Pardo

Welcome to my Fortress of Scraptitude. 🙂

I make a pretty big mess when I scrap, as do most of us I think. But I’ve realized that I don’t have much of a pattern about clean-up. When I read others’ blogs about this subject they seem to fall into one or the other category:

  1. The crafter who makes a mess and then cleans everything up before starting on the next project OR
  2. The crafter who makes a mess and keeps on working until there are so many scraps and tossed aside tools in the way that she can’t see her layout or card any more

I’m a little different (big news, I know). I certainly don’t clean after each project. Sounds nice but takes too much time away from my creative flow. I also never let things get so bad (on my desk) that I clean only because I can’t work any more. No, I spread out…a lot. Matt calls me a “stacker.” I have little stacks everywhere. My craft desk came with a chair, but I hardly ever use it; it’s too convenient a place to stash the things I want out of the way but within reach. My craft room doubles as our guest bedroom, which is awesome because the bed is just to the right of my desk and a perfect place to stack more crap. It’s the perfect setup…for a while.

I eventually get overwhelmed by this stack-heavy environment and realize that it’s affecting my creative mojo. That’s the perfect time to clean! It means I’m motivated, which is the best we can ever ask for when it comes to cleaning, right?

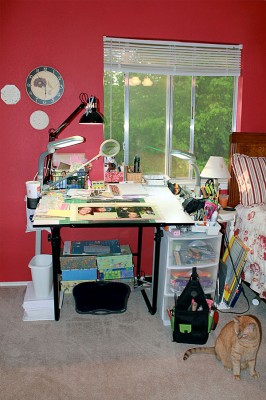
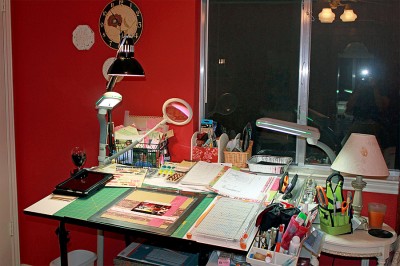
Here are a few more photos of my creative space, in the interest of full disclosure. 😉 Why don’t you tell me a little about how/when you clean your scrap dominion?

CraftRoom1

Here is a shot of command central in my Fortress of Scraptitude.

CraftRoom2

Stacks surround me, along with a glass of red wine for inspiration.

CraftRoom3

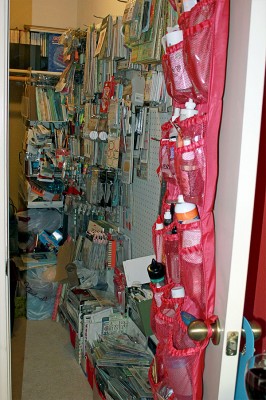
My craft closet is sort of organized. Aren't you proud of me?

Filed Under: Layouts based on sketches, My scrapbook layouts Tagged With: 1 photo, one-page layouts, scrapbook philosophy, Silhouette

This is the only photo I have of my paternal grandfather

March 30, 2011 By Janice Daquila-Pardo 4 Comments

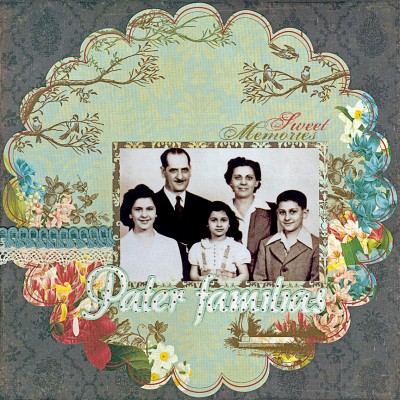
PaterFamilias_JDaquila-Pardo

"Pater familias" is Latin for "father of the family"

Today the Twisted Sketches site launches its 94th sketch, and it’s a good one! The sketch as well as the design team’s interpretations are all waiting to inspire you.

This is my rendition of the sketch. It highlights the only photo I have of my father’s childhood that also includes his father. I never met my grandfather, as he passed away in my dad’s teenage years, so I adore this photo. This portrait was taken in 1944, making my dad 11 years old.

I chose the Latin “pater familias” as my title because it means “father of the family.” In fact, the term pater familias had specific legal meaning in Roman times, when the head of the family was expected to be a good citizen to his own familia as well as to the broader community. In theory at least, he held powers of life and death over every member of his extended familia through ancient right.

It’s quite interesting to read about, but honestly the first time I ever heard the term was in the 2000 film, O Brother, Where Art Thou? Such a good movie. Here’s the clip:

I don’t know about you, but I really love creating a layout where just about every product used is from a different company. It feels like a little more of an accomplishment to me than creating a page using all products from the same line. In this design the patterned papers are from Crate Paper, Webster’s Pages, My Mind’s Eye and Making Memories. The trims are from Making Memories and Hobby Lobby, and the rub on is from K&Company. Now that’s just good, clean scrapping fun!

Filed Under: Layouts based on sketches, My scrapbook layouts Tagged With: 1 photo, one-page layouts, Silhouette, Twisted Sketches, vintage photos

« Previous Page
Next Page »

Primary Sidebar

Thanks for visiting!

Hi, I'm Janice.

Follow me

Follow on Bloglovin

My sketches on Pinterest

Design team

I am a proud Stuck?! Sketches designer!

Past design teams

Scrap & Music sketch designer

Creative Scrappers sketch designer

Sketches With a Twist sketch designer

Sketchabilities design team

Twisted Sketches design team

Secondary Sidebar

Topic categories

  • 12×12 layouts using 6×6 paper
  • Cards
  • Freebies/giveaways
  • Layouts based on sketches
  • Layouts using 3×4 journaling cards
  • My scrapbook layouts
  • Reviews
  • Scrapbook products
  • Sketches
    • My sketches
  • That redo that you do
  • Tips
  • Tutorials
  • Uncategorized

Archives

Tags

1 photo 2 photos 3 photos 4 photos American Crafts banner Basic Grey Bella Blvd Blogtoberfest border punches cards Christmas Copic coloring Crate Paper Creative Scrappers Echo Park emotional journaling Fancy Pants Halloween hand stitching Jillibean Soup Little Yellow Bicycle Making Memories Martha Stewart Crafts My Mind's Eye October Afternoon one-page layouts Pebbles Pink Paislee rosette Scrap & Music sketches scrapbook philosophy Silhouette Simple Stories Sketches with a Twist Sketch Support Spellbinders stamping Stuck?! Sketches Tim Holtz Distress Ink tutorial Twisted Sketches two-page layouts vintage photos We R Memory Keepers

Copyright © 2010-2018 The Constant Scrapper