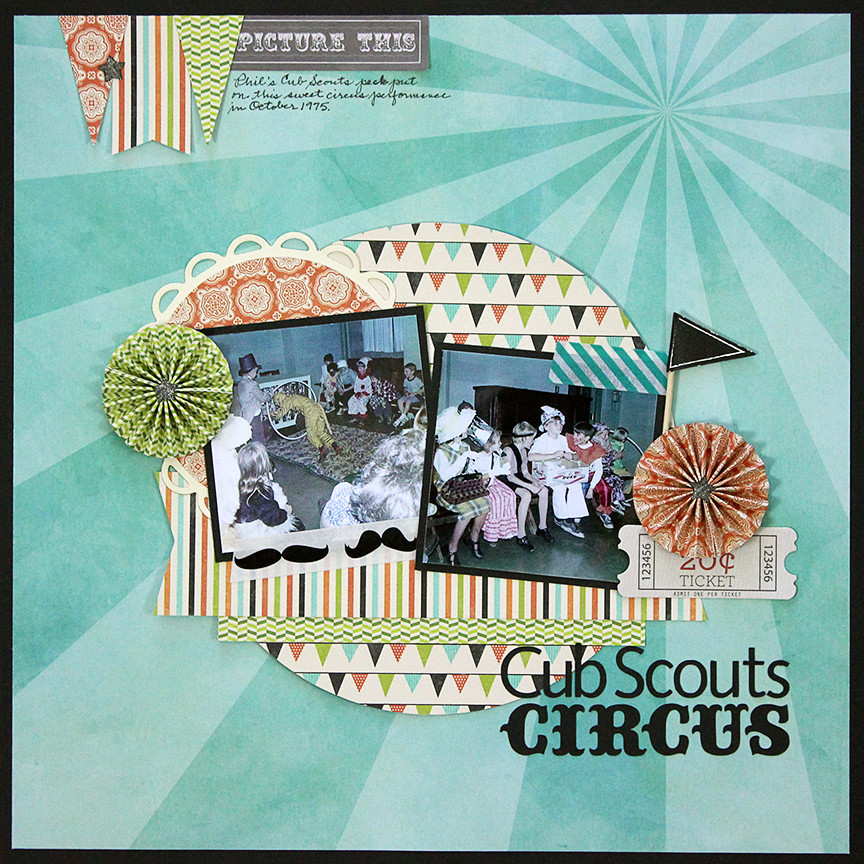
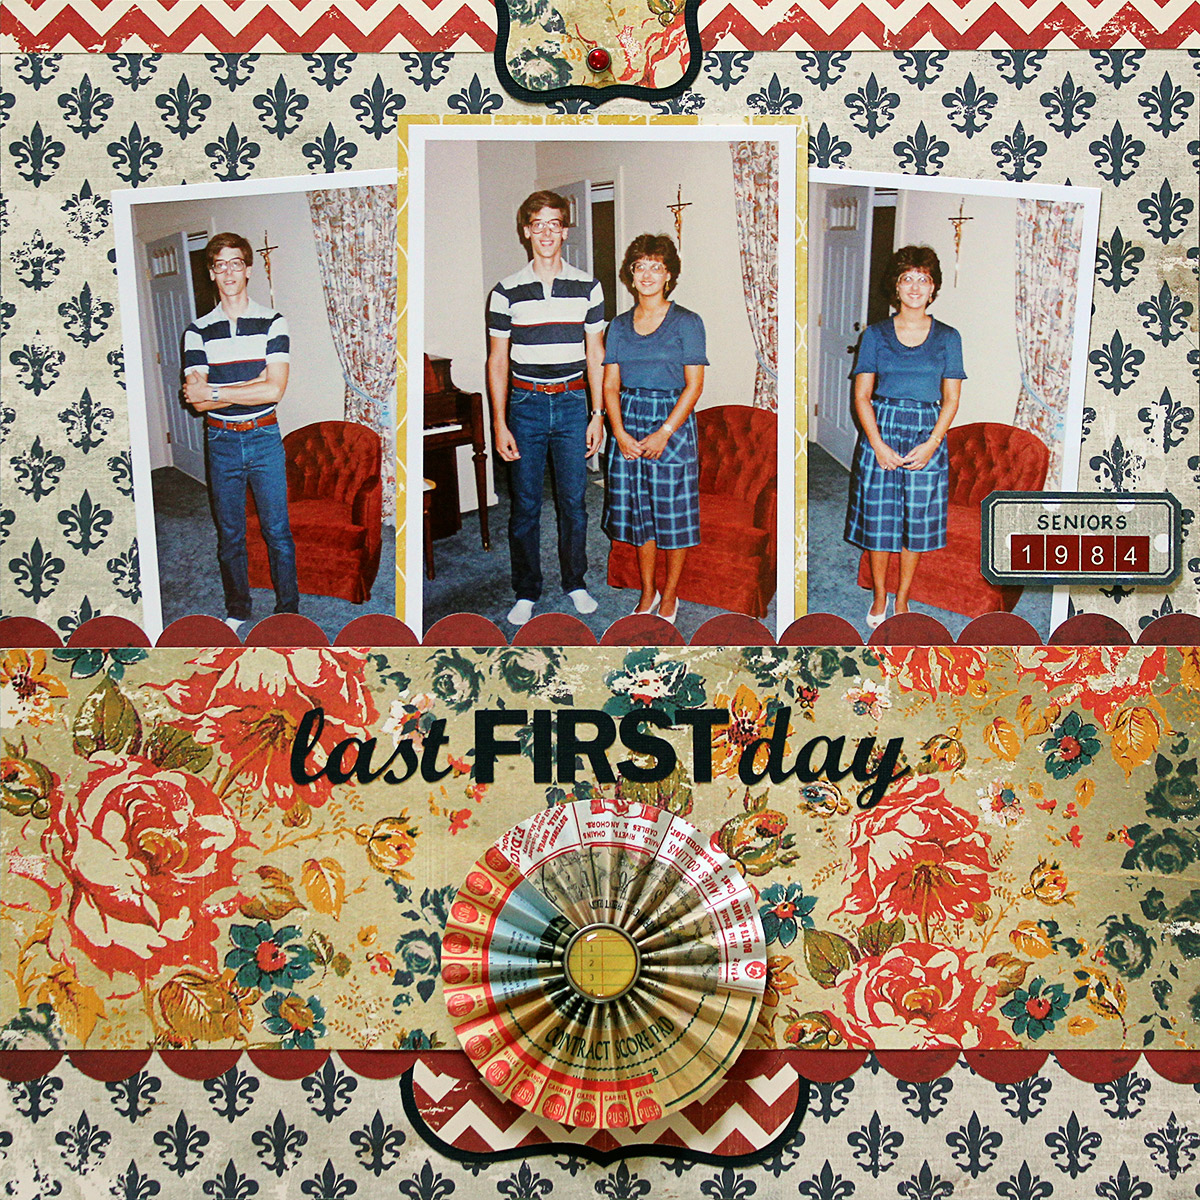
• Skip to primary navigation
  • Skip to main content
  • Skip to primary sidebar
  • Skip to secondary sidebar
  • Home
  • About me

The Constant Scrapper

If I'm not scrapbooking I'm thinking about scrapbooking!

rosette

Last first day

October 2, 2018 By Janice Daquila-Pardo Leave a Comment

Last first day

The story

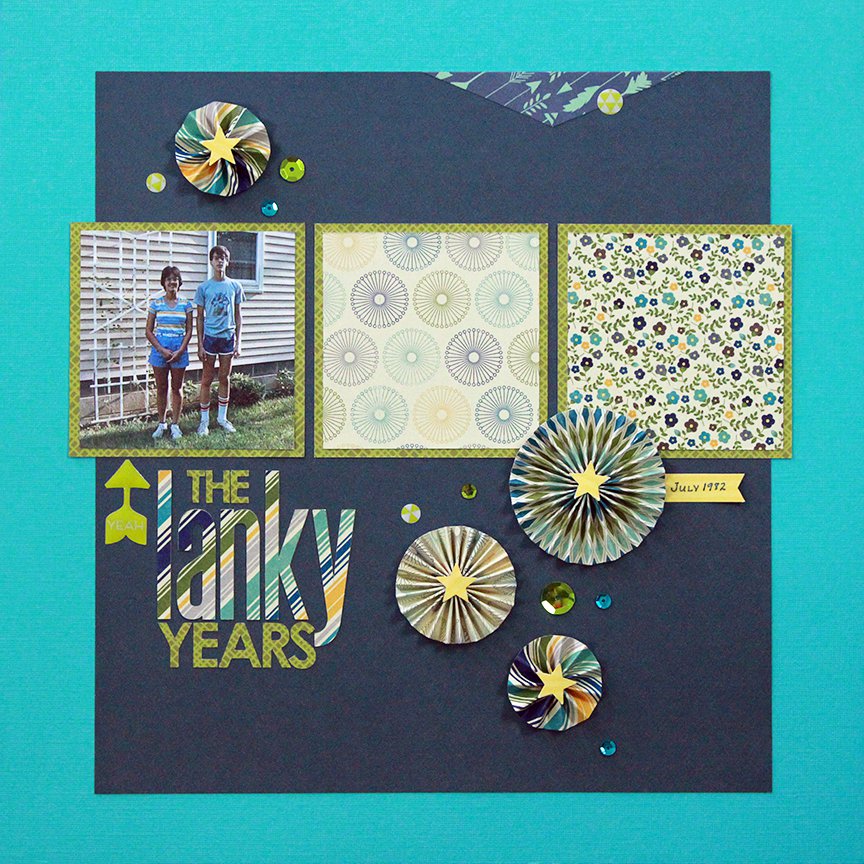
This was the last of our traditional first-day-of-school photo shoots—Phil and me at the start of our senior year in the fall of 1984.
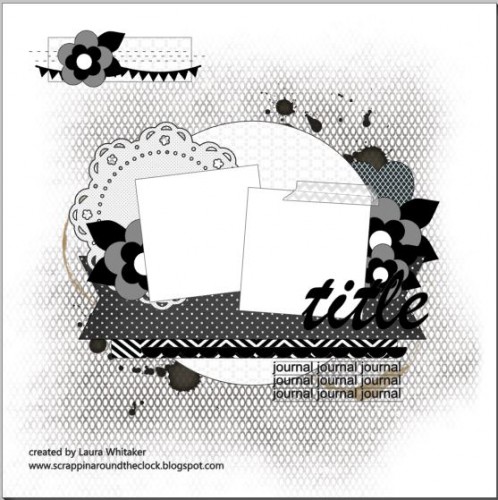
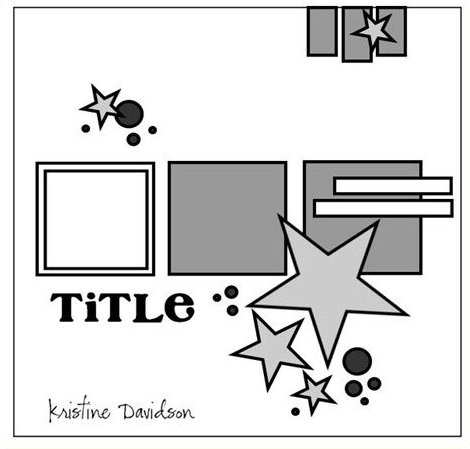
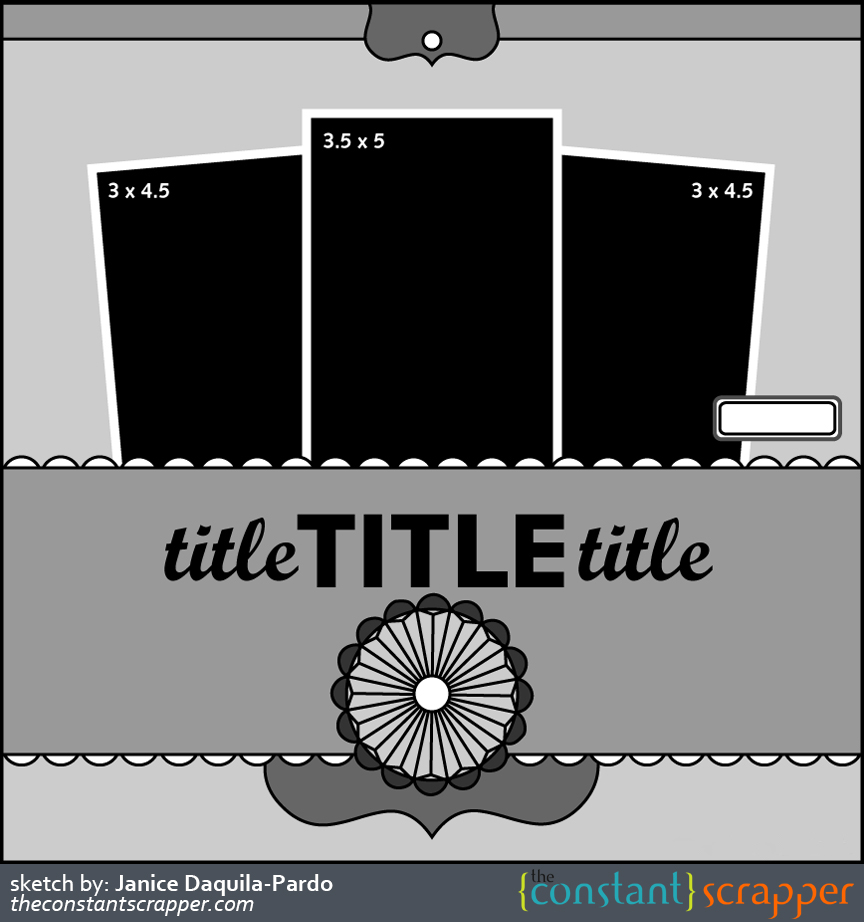
The sketch

This sketch is made for either three photos or one center photo and some surrounding patterned paper or journaling cards. If you make a layout based on this sketch, please link it up at the end of this post; I would just love to see what you’ve made with it.

The Constant Scrapper Sketch 5

Product/technique notes

I created this page with products from the Glitz Design Yours Truly collection and designed/cut the title with my Silhouette.

Filed Under: Layouts based on sketches, My scrapbook layouts, My sketches, Sketches Tagged With: 3 photos, border punches, one-page layouts, rosette, Silhouette, vintage photos

Cub Scouts circus

October 29, 2015 By Janice Daquila-Pardo 5 Comments

Cub Scout circus is a two-photo scrapbook page using an October 2015 sketch from ScrapMuch?

My brother and I were in Cub/Boy Scouts and Brownies/Girl Scouts in the 1970s and learned so much by participating. These photos are from a circus that Phil’s Cub Scouts pack put on for their families in October 1975.

Go ahead, you can say it: That’s 40 years ago this month! You can remember things from that long ago? I know. I amaze myself, too.

Phil is the cute little clown in the photo on the right. So, that explains a lot.

Product/technique notes

I followed the October 9th ScrapMuch sketch below and used patterns from the Jillibean Soup Witches Brew 6×6 paper pad. I created the title on my Silhouette (using the Big Top font for the word “circus”) and folded some rosettes as embellishments (they seemed circus-y to me, too).
ScrapMuch 10 October 9 2015

I am also participating with this layout in the Scrap Our Stash Scraptoberfest challenge:
Scrap Our Stash Scraptoberfest challenge

Filed Under: 12x12 layouts using 6x6 paper, Layouts based on sketches, My scrapbook layouts Tagged With: 2 photos, Jillibean Soup, one-page layouts, rosette, Silhouette, vintage photos

The lanky years

July 12, 2015 By Janice Daquila-Pardo Leave a Comment

The lanky years is a one-photo scrapbook layout using Jillibean Soup products.

The first thing I thought of when I came upon this photo of me and my baby bro in the summer of 1982 was of how skinny we both were! That seemed like a good enough reason to do a layout. 🙂

Product/technique notes

I followed this June sketch from My Creative Scrapbook, used patterned papers from the Jillibean Soup Avocado Soup 6×6 paper pad and designed and cut the title on my Silhouette.
My Creative Scrapbook June 2015 sketch

Filed Under: 12x12 layouts using 6x6 paper, Layouts based on sketches, My scrapbook layouts Tagged With: 1 photo, Jillibean Soup, one-page layouts, rosette, Silhouette, vintage photos

Wine bottle tag tutorial

December 13, 2014 By Janice Daquila-Pardo Leave a Comment

TisTheSeasonWineTags1_Daquila-Pardo

We have some Christmas parties to attend this weekend, so I thought I would try my hand at making some wine tags to adorn the bottles we took along. Here’s a tutorial based on what I learned while creating mine.

Tutorial

  1. Cut base paper (I used cardstock, but it would look quite nice with patterned paper as well) to 3 x 10 inches.
  2. Score base paper at 3 inches.
  3. Cut patterned paper to 2.75 x 9.75 inches.
  4. Don’t score the patterned paper yet; you want to wait until it’s lined up properly on the base paper so you know exactly where it needs to be folded. But I do recommend scoring a second time so that your project folds crisply. I’ll tell you when.
  5. Notch the bottom of the patterned paper into a banner shape.
  6. Lay the patterned paper on the base paper and cut the matching notch into the base paper.
  7. Flip the base paper over and find the center of the 3-inch section by lightly drawing an X from corner to corner. This will ensure that you punch your bottle neck opening in the right spot.
  8. At this point, because I use adhesive that isn’t hard to pull up, I adhered the two papers together so that I could punch them at the same time. Then I used a 1.25-inch circle punch to create the bottle neck opening.
  9. Carefully pull up the patterned paper from the base paper and line up a 1.5-inch circle punch around the original hole to create the double ring effect. Glue the two papers back together.
  10. Now put the project back on your scoring board and score again at 3 inches.
  11. Have fun embellishing your wine tags!
TisTheSeasonWineTags2_Daquila-Pardo

Closeup shot of the left tag

TisTheSeasonWineTags3_Daquila-Pardo

Closeup shot of the right tag

Product/technique notes

I created both of these tags using past years’ My Mind’s Eye Christmas collections—”Festive” on the left tag and “Be Merry” on the right one. I loved how they turned out! And I’m entering them in the MME December challenge to make small gifts/stocking stuffers.

Filed Under: Tutorials Tagged With: Christmas, My Mind's Eye, rosette

It doesn’t matter where you’re going, it’s who you have beside you

September 19, 2013 By Janice Daquila-Pardo Leave a Comment

BesideYou_Daquila-Pardo

We're just running errands together on a sunny Sunday afternoon in July.

When I saw the 3×4 cut-apart sheet from Jilliean Soup’s “Happy camper stew” collection, I knew that I had to have it for this one card with the pair of foxes. I had recently taken some photos of Matt as we were driving around Austin. Just simple this-is-regular-life photos. I didn’t know exactly what I wanted to do with them until I read the phrase on that card: “It doesn’t matter where you’re going, it’s who you have beside you.” That about says it, doesn’t it? I mean, if you’re heading somewhere spectacular, but the person you’re “in the car” with isn’t, the destination loses a little of its glow.

So, I just wanted to make sure to capture this memory of:

  • Matt looking pretty darn great after losing about 55 pounds (he’s lost more since this photo)
  • Driving around Austin, TX
  • In our Toyota Prius V
  • On July 28, 2013

Filed Under: Layouts using 3x4 journaling cards, My scrapbook layouts Tagged With: 1 photo, Jillibean Soup, one-page layouts, rosette, Silhouette

Next Page »

Primary Sidebar

Thanks for visiting!

Hi, I'm Janice.

Follow me

Follow on Bloglovin

My sketches on Pinterest

Design team

I am a proud Stuck?! Sketches designer!

Past design teams

Scrap & Music sketch designer

Creative Scrappers sketch designer

Sketches With a Twist sketch designer

Sketchabilities design team

Twisted Sketches design team

Secondary Sidebar

Topic categories

  • 12×12 layouts using 6×6 paper
  • Cards
  • Freebies/giveaways
  • Layouts based on sketches
  • Layouts using 3×4 journaling cards
  • My scrapbook layouts
  • Reviews
  • Scrapbook products
  • Sketches
    • My sketches
  • That redo that you do
  • Tips
  • Tutorials
  • Uncategorized

Archives

Tags

1 photo 2 photos 3 photos 4 photos American Crafts banner Basic Grey Bella Blvd Blogging for Scrapbookers class Blogtoberfest border punches cards Christmas Copic coloring Crate Paper Creative Scrappers Echo Park emotional journaling Fancy Pants Halloween hand stitching Jillibean Soup Little Yellow Bicycle Making Memories Martha Stewart Crafts My Mind's Eye October Afternoon one-page layouts Pebbles Pink Paislee rosette Scrap & Music sketches scrapbook philosophy Silhouette Simple Stories Sketches with a Twist Sketch Support Spellbinders stamping Stuck?! Sketches tutorial Twisted Sketches two-page layouts vintage photos We R Memory Keepers

Copyright © 2010-2018 The Constant Scrapper