• Skip to primary navigation
  • Skip to main content
  • Skip to primary sidebar
  • Skip to secondary sidebar
  • Home
  • About me

The Constant Scrapper

If I'm not scrapbooking I'm thinking about scrapbooking!

Tips

Tim Holtz Distress Markers 5-pack color lists

September 27, 2012 By Janice Daquila-Pardo 74 Comments

When the Tim Holtz Distress Markers by Ranger came out months back, I loved the idea. But rather than buying the whole set before even getting to try out one marker, I decided to look for ways to buy them in smaller chunks. So, when I started seeing 5-packs of these markers at Hobby Lobby and Michaels I excitedly bought them (with coupons, of course).

But I quickly became distressed (pun fully intended) at the lack of information on the product packaging. Some of the sets had names—such as Memories Past and Country Fair—but these were only printed on the store SKU tag and not the bubble pack, and not all of them even had names. Kind of weird.

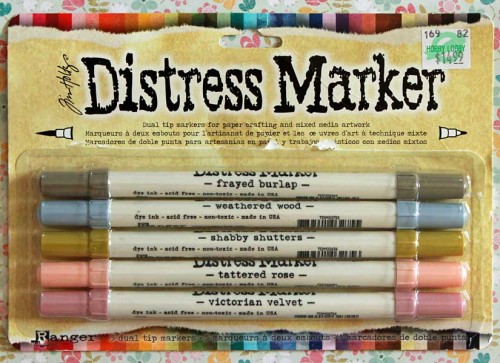
But the bigger problem was that the color names of the included markers weren’t listed anywhere! It wasn’t printed on the cardboard backing. And the way the markers were packed in the plastic made it so that only one marker was turned up and readable.

Then, when I came home to look for the list online I still couldn’t find any details! The reason I was so diligent about finding this info is that I wanted to be sure, before opening the product and making it harder to return, that none of the sets had duplicate colors.

Well, I finally decided, after comparing all the sets and figuring that there didn’t look to be any color overlap, that I would just open them. It worked out because I now have 25 of the colors and I like the markers. But my frustration over not finding these colors listed anywhere turned into a little project to benefit my readers. And so I give you…

The Distress Markers 5-pack color lists:
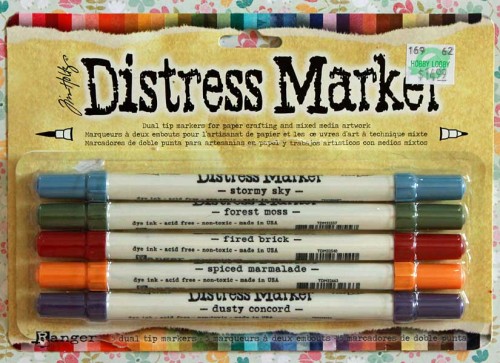
TimHoltzDistressMarkersClutteredCellar

Cluttered Cellar includes: stormy sky, forest moss, fired brick, spiced marmalade and dusty concord

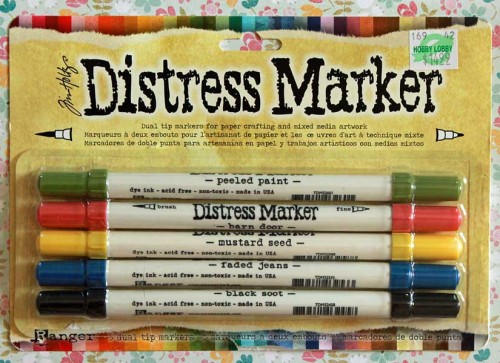
TimHoltzDistressMarkersCountryFair

Country Fair includes: peeled paint, barn door, mustard, faded jeans and black soot

TimHoltzDistressMarkersEstateSale

Estate Sale includes: frayed burlap, weathered wood, shabby shutters, tattered rose and Victorian velvet

TimHoltzDistressMarkersMemoriesPast

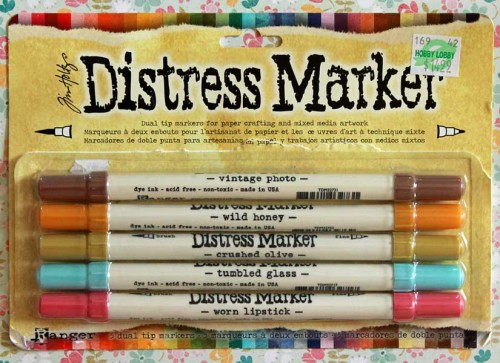
Memories Past includes: vintage photo, wild honey, crushed olive, tumbled glass and worn lipstick

TimHoltzDistressMarkersVictorianShabby

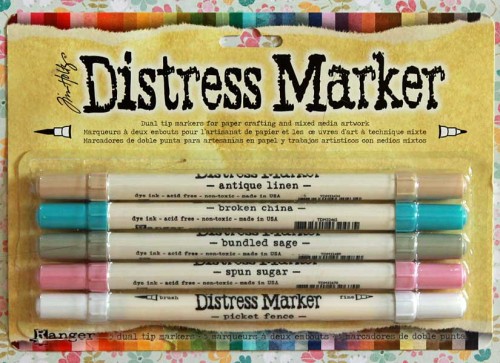
Victorian Shabby includes: antique linen, broken china, bundled sage, spun sugar and picket fence

I really hope this is helpful to you. If you have found any other color collections of these markers, will you please leave me a comment to tell me the name of it and which colors are included?

Update

I’ve received a helpful update from reader Monica, who says there is another 5-piece set called Hillside, which has the following colors:
Aged Mahogany
Dusty Concord (also in Cluttered Cellar)
Pine Needle
Spiced Marmalade (also in Cluttered Cellar)
Walnut Stain

It sounds like Ranger isn’t going to make it easy for us to collect all the distress markers through sets, which is unfortunate because I think it makes them seem less customer friendly. It seems like a marketing ploy to force us to buy duplicates just so we can take advantage of the better pricing that bundles afford. Do you think you will buy the “Hillside” set even if you already have the others, or are the duplicates going to keep you from making the purchase?

Update #2 (2014)

Tim Holtz Distress Markers now total 49 colors (the original full set included 37 colors). The new colors are available as a 12-color set (in their own 2-inch storage tube) for those who bought the original full set and want to update to the new full set). You can also buy the whole updated 49-color set (in 4-inch storage tube). Or you can buy individual colors as open stock.

The colors included in the 12-marker seasonal set are:
Evergreen Bough
Festive Berries
Gathered Twigs
Iced Spruce
Mowed Lawn
Peacock Feathers
Picked Raspberry
Ripe Persimmon
Salty Ocean
Seedless Preserves
Shaded Lilac
Squeezed Lemonade

There are more sets to add to your watch list:
Boardwalk:
Evergreen Bough
Shaded Lilac
Salty Ocean
Festive Berries
Squeezed Lemonade

Marketplace:
Mowed Lawn
Peacock Feathers
Picked Raspberry
Ripe Persimmon
Seedless Preserves

Update #3 (2015)

Thank you to reader Katie, who left a helpful comment about finding the 12-piece tube with all the 2015 monthly releases at Hobby Lobby:
Mermaid Lagoon
Hickory Smoke
Cracked Pistachio
Blueprint Sketch
Twisted Citron
Abandoned Coral
Wilted Violet
Lucky Clover
Fossilized Amber
Carved Pumpkin
Ground Espresso
Candied Apple
Filed Under: Reviews, Scrapbook products, Tips

My first visit to Disneyland

June 30, 2012 By Janice Daquila-Pardo Leave a Comment

FirstDisney_Daquila-Pardo

Who's afraid of the Big Bad Wolf? Not me!

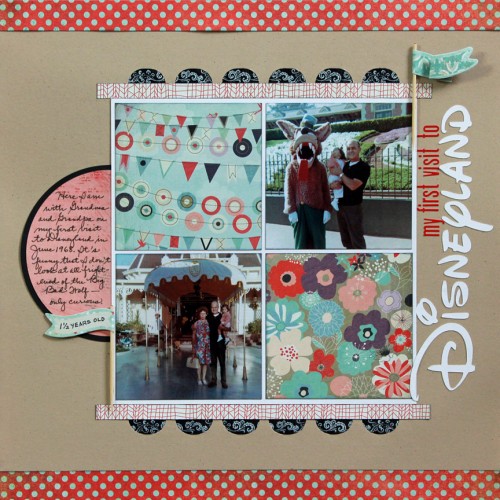
My mom lived in California from the time she was seven until leaving to attend college in Ohio right after high school, but her parents lived there for the remainder of their lives. So, once Mom and Dad started having a family, they frequently traded visits between California and Ohio so Mom’s parents could spend time with their grandchildren. Obviously, I don’t remember this time, but during our visit in June 1968 Grandma and Grandpa took me to Disneyland for the first time.

In creating this layout, I have hit upon a little tip I can share with you about making identifications in vintage photos.

I know the details my mom wrote on the back of these shots—because I scan the fronts and backs of my old photos—which said that it was June 1968 and that I was with the Big Bad Wolf. So right there, I have some great information. But as I was coming to the journaling part of this page, I started worrying about which amusement park featured the Big Bad Wolf. I mean, I thought it was Disneyland, but I wasn’t sure. It could have been Knott’s Berry Farm, which I know we also visited on at least one of our trips to California. And I wanted to be sure before putting pen to paper.

So I turned to Google’s images search and typed in “Disneyland 1968.” I thought this was probably a long-shot way to start my search, but I knew that I could refine it if need be.

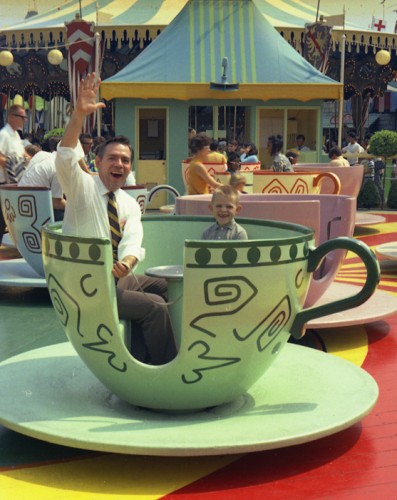
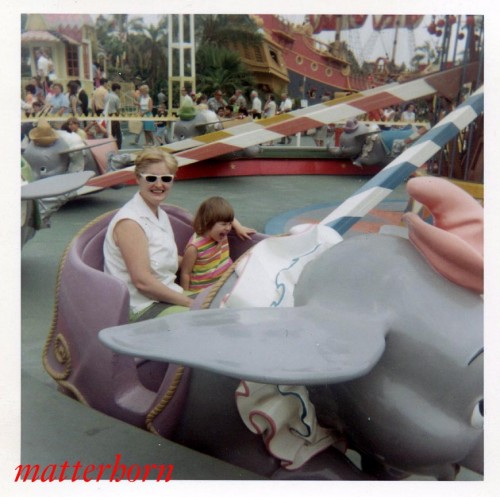
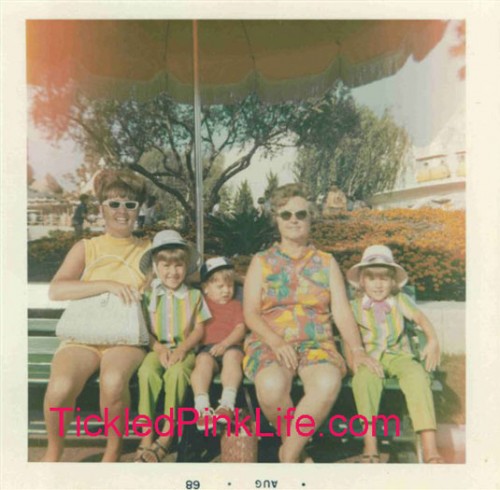
First of all, I encourage you to do a search like this just for the fun of seeing the old Kodacolor images of people in their 60s garb and Disneyland in all its 60s glory. Just take a look at a few of the wonderful images I found:

teacup

This image came from http://home.earthlink.net/~rxunit/id15.html.

1968trip3

This image came from http://matterhorn1959.blogspot.com/2009/12/childs-trip-to-disneyland-1968.html.

Disneyland-1968-Tomorrowlan

This image came from http://www.tickledpinklife.com/2011/02/when-the-peoplemover-was-the-futur/

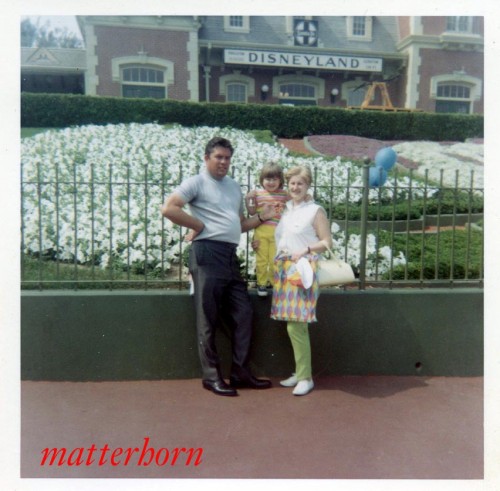
Now back to my objective for doing this search: I hit paydirt on the first try! Take a look at this image and then compare it to the Big Bad Wolf photo on my layout. My heart sped up when I noticed the same building and landscaping (it’s a Micky Mouse flower bed) in the background as in my photo! This was enough proof for me that these photos of mine were taken in the Magic Kingdom.

1968trip2

This image came from http://matterhorn1959.blogspot.com/2009/12/childs-trip-to-disneyland-1968.html.

So the next time you’re casting about for details to include in your journaling or to confirm the places, events or times in your vintage photos, try a Google image search. This is a rich resource for photo research, and I say the more details the better when you’re creating a special page like this.

Product/technique notes: All the patterned papers I used on this project were from the BasicGrey’s Up, Up & Away, PB&J and Serendipity collections. I created the black ribbon scallops using one of the We R Memory Keepers Sew Ribbons tools. The Disney font that I cut using my Silhouette is called Waltograph.

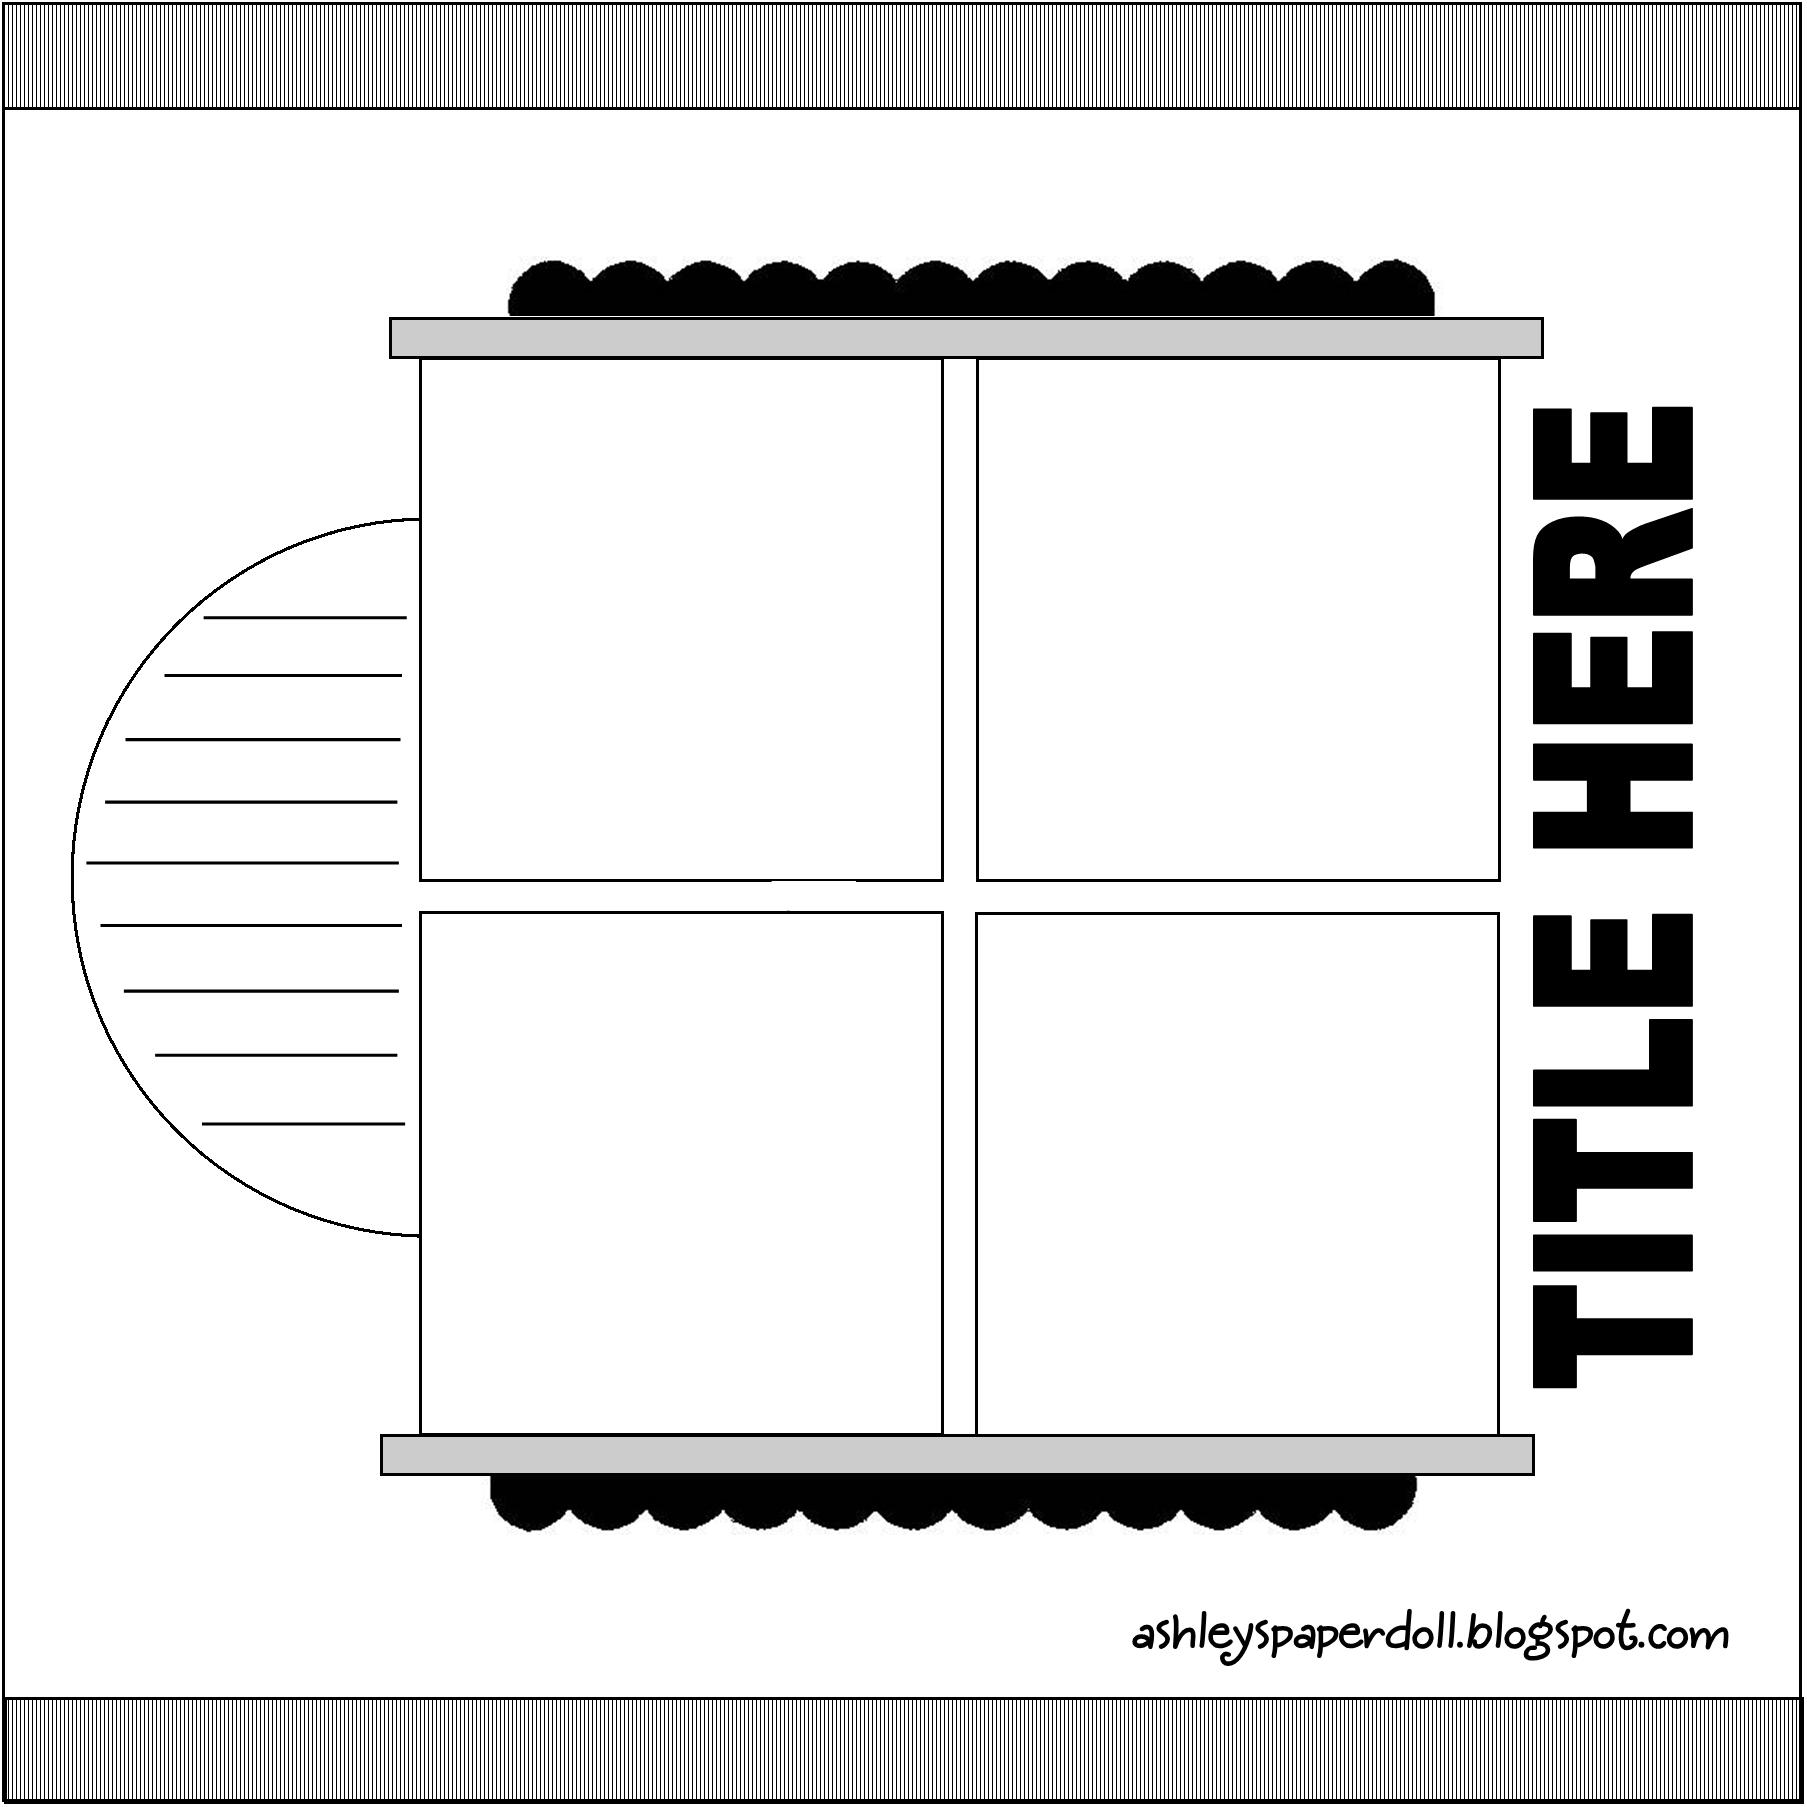
And I used this sketch provided at Club CK for their June challenge:
The June sketch from Club CK

Filed Under: Layouts based on sketches, My scrapbook layouts, Tips Tagged With: 2 photos, Basic Grey, one-page layouts, Silhouette, vintage photos, We R Memory Keepers

Keep Austin Weird Festival + 5k

June 24, 2012 By Janice Daquila-Pardo 2 Comments

KeepAustinWeird3_Daquila-Pardo

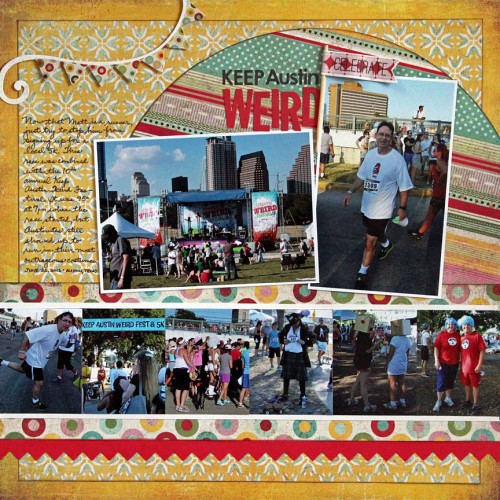
There were lots of great costumes to enjoy while attending the Keep Austin Weird Festival and 5k.

Is a part of your summer fun to attend sporting events in support of a family member? Well, now that my husband has started running, it has become a part of mine! As any sports enthusiast or sports enthusiast’s spouse/parent/sibling knows, the participant wants an audience. It’s akin to the question about the tree falling in the woods. If a runner crosses the finish line but no one they know was there to witness it, did they even run the race?

And so I found myself yesterday at the very colorful 10th annual Keep Austin Weird Festival + 5K in downtown Austin, Texas. There was a large stage featuring one band after another, plentiful drinks and food and lots of Austinites doing their utmost to keep their fair city as weird as possible (read: lots of fun costumes). The festival ran from early afternoon on into the night, and the race was set to begin at 7:00 p.m.

Do you have any idea how hot it gets in Texas in the summer? Let me put it this way: When the starter pistol rang out at 7:00, it had come down to 95 degrees. Yes, you do have to be a little crazy to run in this weather, but then I guess that’s part of the point at this festival.

So, just in case you, like me, are the official cheerleader and photographer at events like this, following are a few things I’ve learned about capturing the kind of images you will need to tell the whole story later in your scrapbook pages and/or blog.

Take your best camera

As scrapbookers, one of our most important tools is our camera. If you have more than one—the expensive camera and the little spy camera you keep in your purse at all times—haul along the good one. You will hate the weight of it, as well as fumbling with changing lenses if you have a DSLR, but you will be so much happier with the photos you get. Lug it and love it.

Dress comfortably

When I’m photographer at Matt’s races, I get a workout, too. I wear a large backpack so that I can carry my camera equipment as well as Matt’s supplies, so it gets rather heavy. And I run a lot to be where the shot is. Because of this I wear clothes that are roomy so they don’t cling to me when I sweat, appropriate for the weather and really practical. Yesterday I wore a comfy sun dress and tennis shoes. I’m sure I couldn’t have won any prizes for fashion, but my clothes didn’t hinder me, and that’s all I cared about.

Get before and after photos

Before I let Matt head over to the starting line, I make him stand for a few photos. I want to have shots of him while he’s still fresh and clean as well as nervous for the event to come. I also do my best to be at the finish line to capture his last steps. But I also make sure to shadow him as he huffs and puffs his way over to the water and banana stand. The idea is to get photos of the red face, the sweat and the exhaustion. If he worked that hard, I want to be sure to celebrate it on my layout later.

Capture the local flavor

There’s always something interesting about the location of an event. If it’s in a rural setting, be sure to set the scene by capturing the natural surroundings. If it’s in an urban setting like this festival we attended, get shots of the skyline and the crowds.

Vary the distance of your shots

To tell the whole story of an event, it’s important to get photos that expose different perspectives. You want close-up shots of the sporting equipment your family member is using, images of the crowds, posed and unposed photos of your subject and action shots. Vary the distance, vary the perspective.

Conduct a post-event interview

When Matt is still breathing heavily and high on adrenaline at the end of a race, I like to flip over to the video feature on my camera and spend a few minutes capturing his thoughts about the event. Not only is it great to have this video to watch in the future, but also it provides such a rich source of journaling for that layout you’re going to create later!

Don’t let those summer days drift away without capturing the sun-drenched fun!

Product/technique notes: All the supplies I used on this layout are from the BasicGrey Serendipity and Shine On collections.

Filed Under: My scrapbook layouts, Tips Tagged With: Basic Grey, one-page layouts

Field notes from a scrapbook convention

September 20, 2011 By Janice Daquila-Pardo Leave a Comment

This weekend I attended the Creating Keepsakes Scrapbook Convention in San Marcos, Texas. I have made the short drive from Austin to San Marcos for this convention two or three other times over the years, and I would say this is the best one I’ve been to so far. The main reason I give this year’s event the highest marks yet are because many of the vendors actually brought new products with them that I haven’t yet seen at my local stores!

You might be thinking, “Jan, do you mean that I could set aside a day of my weekend, drive to San Marcos and pay my $10 to get in the door at the Embassy Suites—all just so that I can shop for new scrappy products—only to find old merchandise?” To which I would think, “Yes, that’s exactly what I mean.”

There have been years that I’ve found tables full of what looked like old inventory the vendors had dug out of the farthest corners of their warehouses. Very disappointing, not to mention inappropriate! How many scrapbook enthusiasts who would make the time and effort to pay to shop for their hobby would be interested in anything but the newest offerings? So, whether the improvement came about because of attendee feedback (which I certainly gave in past years) or because the vendors realized that they weren’t doing their sales numbers any favors, I don’t know. I’m just happy to report that I came home with more brand-new items this time. Score!

Tips for going to a scrapbook convention

I was also thinking about the things I’ve learned by going to these a few times and have put together a little list of tips for any of you who haven’t been to a local convention and are thinking of going to the next one that comes to town:

  • Dress for comfort. You’re on your feet all day in an over-air conditioned hotel/convention center. Dress in layers and wear tennis shoes.
  • Take your own shopping bag. You aren’t allowed to bring wheeled craft carts into the shopping area (it would make things way too crowded), but that doesn’t mean you can’t bring a bag for carrying what you’ve bought. The first year I went I just carried around the bags that my purchases came in, and that became a pain because they really started cutting into my hands after a bit. So I always take a craft bag that straps across my chest and can hold 12×12 paper without bending it. I just slide all my purchases right into that baby and keep my hands free for more important things.
  • Take cash. Yes, most (maybe all) of the vendors take credit cards. However, they don’t all spring to have a telephone line turned on at their booth. This means they run your credit card the old-fashioned way: with carbon paper. I suggest avoiding those kinds of worries by using cash whenever you can. And then only pull out your credit card when it’s a larger purchase and you know they are running it through a phone line.
  • Go as an informed shopper. I’m not suggesting that you spend hours finding out what’s new from all your favorite craft companies just so that you’ll know what products you might see at the convention and what they should cost. That would take way too much work. However, if there’s some specific tool that you’re looking for I would suggest you read up on it a little. Make sure that you know if there are different versions available and what the retail price is so that you know whether the “show deal” is really a deal at all.
  • Don’t be afraid to go alone. I think some people miss out on going to events like this because they don’t know anyone who is interested or available to go with them. I have found that going alone is still lots of fun! I enjoy moving at my own pace and looking closely at one booth and then completely skipping the next, which is much easier to accomplish if you need only please your own tastes and interests. I also find it fun to talk to the friendlier vendors. I never feel lonely when I’m there. Don’t get me wrong here; I have gone with friends and had a great time! In fact, this year I ran into a friend of mine almost as soon as I arrived, and we spent several fun hours together perusing and purchasing. I’m just suggesting that you go whether you have a girlfriend to accompany you or not.
TinaJaniceCKC

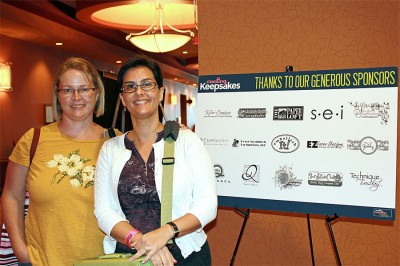
Happily, I bumped into my friend, Tina, and we spent time shopping together!

Overall, I think of going to this kind of scrapbook convention as being a lot like spending the day at an amusement park. If you dress for comfort, are prepared to stand in some lines, understand that the food is going to be overpriced, pace yourself and don’t mind occasionally bumping into other people in the crowd, then you should have a great time enjoying the roller coasters!

Filed Under: Reviews, Tips

7 tips for packing for your next crop

July 19, 2011 By Janice Daquila-Pardo 4 Comments

The first time I went away for a weekend crop with a friend in 2003, I about lost my mind while I was packing for it. I kept running from pile to pile in my craft room, sure that I would “need” some of everything. In the end, I filled the back of my SUV with scrapbook products. I took so much more that I could have possibly needed. I felt overburdened with stuff to lug around and overwhelmed with choices; it just about paralyzed my creativity that weekend!

These days I crop monthly with a few friends at my neighborhood Archiver’s. After our first outing together I realized that the only way I could look forward to these get-togethers on a monthly basis was if I stressed a lot less about the packing. I have a little system now that works quite well for me, and while I was packing for this weekend’s crop I thought I would take a few photos to share with you (as well as the resulting layout at the end of the post).

Tip 1: Pack a limited number of photos

My first big tip is to choose the photos you want to work with ahead of time. That way you can pack products only for those photos. I know we all have tons of photos we need to scrap, but if we take several stacks of photos along we have to try to pack products that could go with all of them. So for my six-hour night of scrapping I start my process by selecting photos for just four or five layouts. I hardly ever get even that many done!

Tip 2: Plan each layout on paper (or in your head)

I start all my layouts with sketches. It’s just how I get down. So for each set of photos I choose a sketch to go with them. This quickly leads me to the product-choice part of my process because I know how many patterned papers and embellishments I’ll need. If you don’t use sketches when you create, try to envision a rough draft of your final layout so that you can pull products from your stash that will work together.

Tip 3: Pull all the products you might need for each project/layout

I look through my stash with sketch and photos in hand and pull products that I like together. Even if I see something that could work for one of my other layouts, I try to focus on one page plan at a time. I’ve fallen into the trap of packing for all the projects at once, a little here and a little there, but it just makes it take longer to pack in the end.

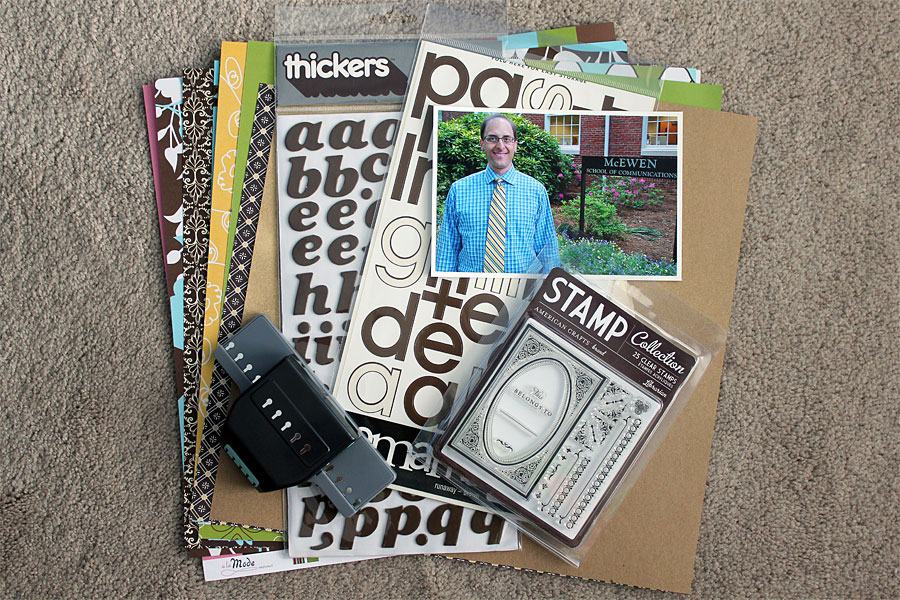
Pull together your products

Tip 4: Create a page kit for each layout

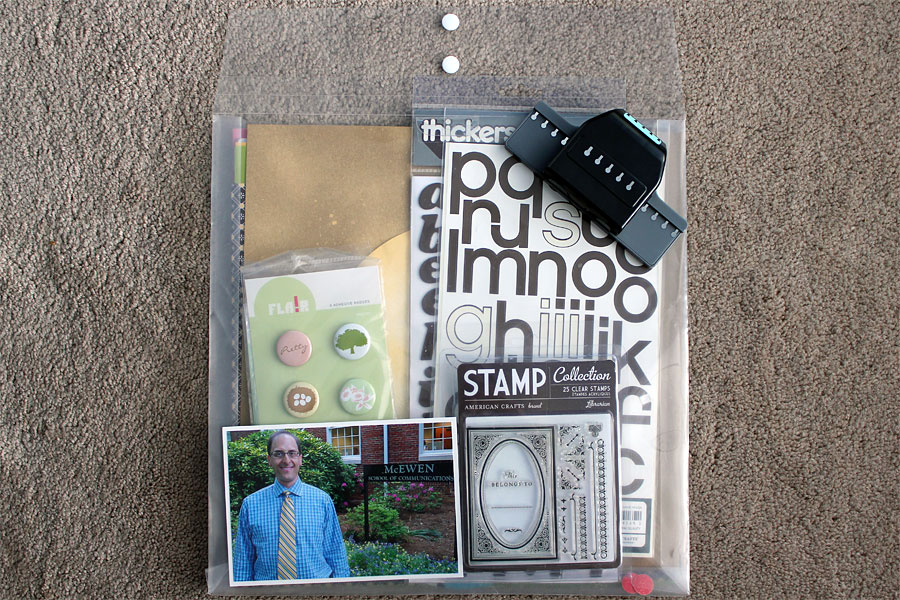
Put everything that’s flat enough to fit into a 12×12 envelope. I just put it all in this one place so I don’t have to dig through my bag for it or remember what I had thought would work well together. That kit is done, so I can move on to the next.

Create a page kit

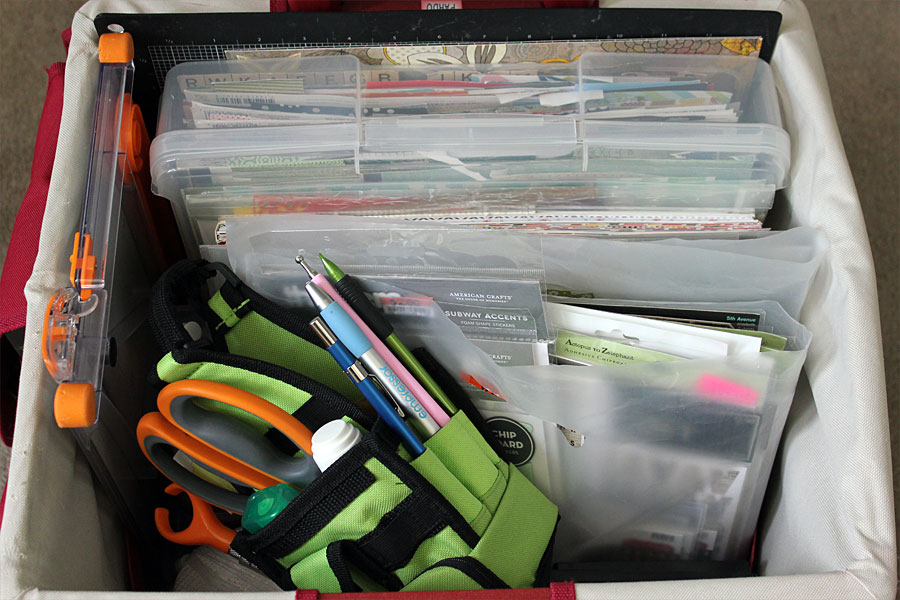
Tip 5: Pack the bulky items and tools

After I’ve packed my separate page kits, I pull together all the tools and extras that I’ll need. There are the constants—like my Basic Grey magnetic mat, paper trimmer, bin of patterned paper scraps, etc. And there are also things that I think I’ll want to use with the page kits but that won’t fit in the envelopes. This includes things like punches, bags of buttons, etc. I pile that all into my rolling organizer (one that I purchased at Costco years ago and still love).

Pack the bulky items last

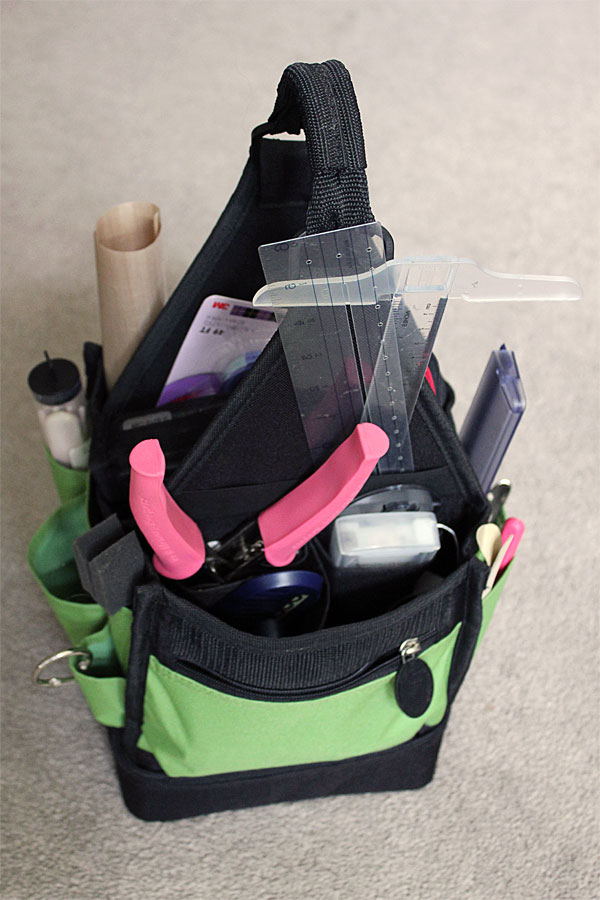
Tip 6: Grab your tool bag

I keep my small-stuff tool bag packed all the time. It sits next to my craft desk, so it’s always in use and ready to go. So, that’s the last step—grab the tool bag and get out that door!

Grab your tool bag

This process of mine takes a little more planning, but it saves me so much packing angst! I kid you not, there’s a woman who sometimes crops on the same night I meet my friends who wheels in a big flatbed cart chockablock full of scrapbook supplies! The time and backache involved in packing that way…well, I’ll just say it’s not for me. I prefer to walk in pulling my little cart and carrying my tool bag. I’ll tell you what, I usually still have more supplies than I need for a night of fun scrapping.

Bonus tip 7: Share

Another way to really cut down on what you pack is to plan on sharing. If your friend always brings her die-cutting machine, offer to bring your dies to share with her each time in exchange for the use of her machine. Or perhaps you have a great collection of punches that you can share, and your buddies can bring their circle cutters or Crop-A-Diles. You get the idea.

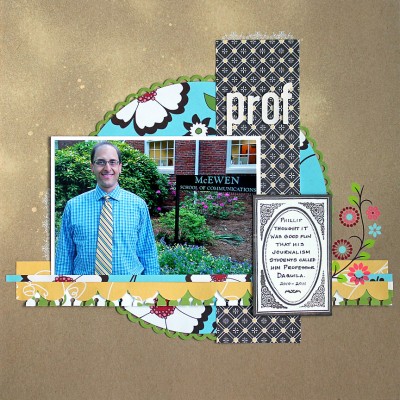
I thought after all that, I should share the layout I made with the page kit shown above. 🙂

Prof_Daquila-Pardo

My baby bro after a day of teaching.

Filed Under: 12x12 layouts using 6x6 paper, My scrapbook layouts, Tips Tagged With: 1 photo, American Crafts, border punches, one-page layouts, scrapbook tips, stamping

Next Page »

Primary Sidebar

Thanks for visiting!

Hi, I'm Janice.

Follow me

Follow on Bloglovin

My sketches on Pinterest

Design team

I am a proud Stuck?! Sketches designer!

Past design teams

Scrap & Music sketch designer

Creative Scrappers sketch designer

Sketches With a Twist sketch designer

Sketchabilities design team

Twisted Sketches design team

Secondary Sidebar

Topic categories

  • 12×12 layouts using 6×6 paper
  • Cards
  • Freebies/giveaways
  • Layouts based on sketches
  • Layouts using 3×4 journaling cards
  • My scrapbook layouts
  • Reviews
  • Scrapbook products
  • Sketches
    • My sketches
  • That redo that you do
  • Tips
  • Tutorials
  • Uncategorized

Archives

Tags

1 photo 2 photos 3 photos 4 photos American Crafts banner Basic Grey Bella Blvd Blogtoberfest border punches cards Christmas Copic coloring Crate Paper Creative Scrappers Echo Park emotional journaling Fancy Pants Halloween hand stitching Jillibean Soup Little Yellow Bicycle Making Memories Martha Stewart Crafts My Mind's Eye October Afternoon one-page layouts Pebbles Pink Paislee rosette Scrap & Music sketches scrapbook philosophy Silhouette Simple Stories Sketches with a Twist Sketch Support Spellbinders stamping Stuck?! Sketches Tim Holtz Distress Ink tutorial Twisted Sketches two-page layouts vintage photos We R Memory Keepers

Copyright © 2010-2018 The Constant Scrapper