

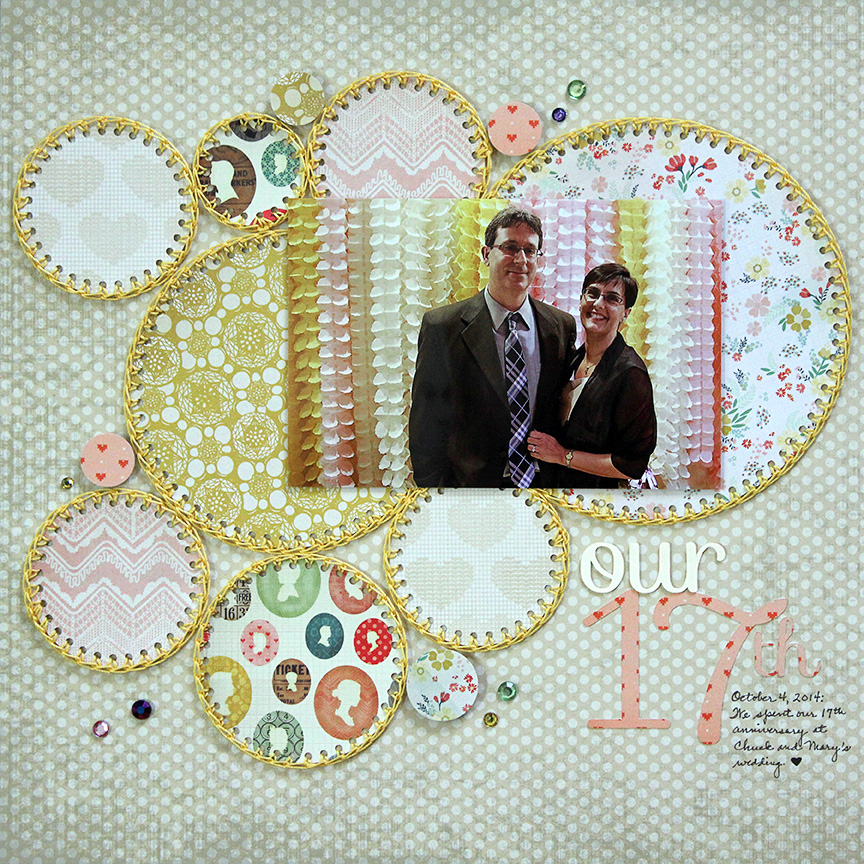
To add the lovely crocheted detail around the circles on this page about our 17th anniversary, I turned to my Sihouette Cameo.
I wanted to create a really special look for this photo of us on our 17th anniversary, so I decided to crochet around the edges of all the circles. Crazy, I know! But it’s really not that hard, and I just love the soft, feminine look. I thought a tutorial would be helpful to any of you who want to try this on your own layout.
The tutorial
For me, it almost always starts with a sketch. In this case I chose to use this circle-filled Paper Camellia sketch. If you want to base the shapes you will crochet upon a sketch then you need to start by placing the sketch image in the Silhouette design software:

Step 1: Go to File :: Open :: Folder holding your sketch :: Open sketch. Size the image to fit the 12×12 Cameo mat in the Silhouette software.
Start drawing the shape(s) to be crocheted:
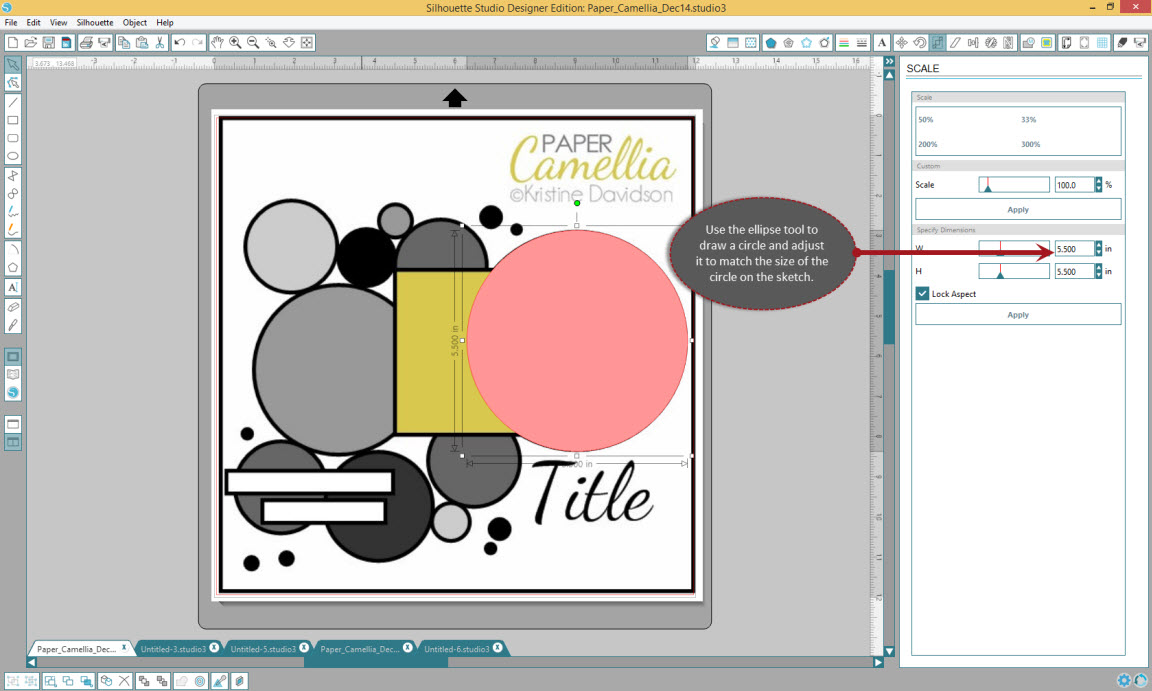
Step 2: Use the ellipse tool to draw a circle and adjust it to match the size of the circle on the sketch.
Copy/paste the first shape and reduce it:

Step 3: Select the circle and CTRL + C to copy then CTRL + F to paste on top of the first circle. Use the scale tool to reduce the top circle by 0.25 inches.
Turn to the rhinestone tool to create holes around the edge of the shape:
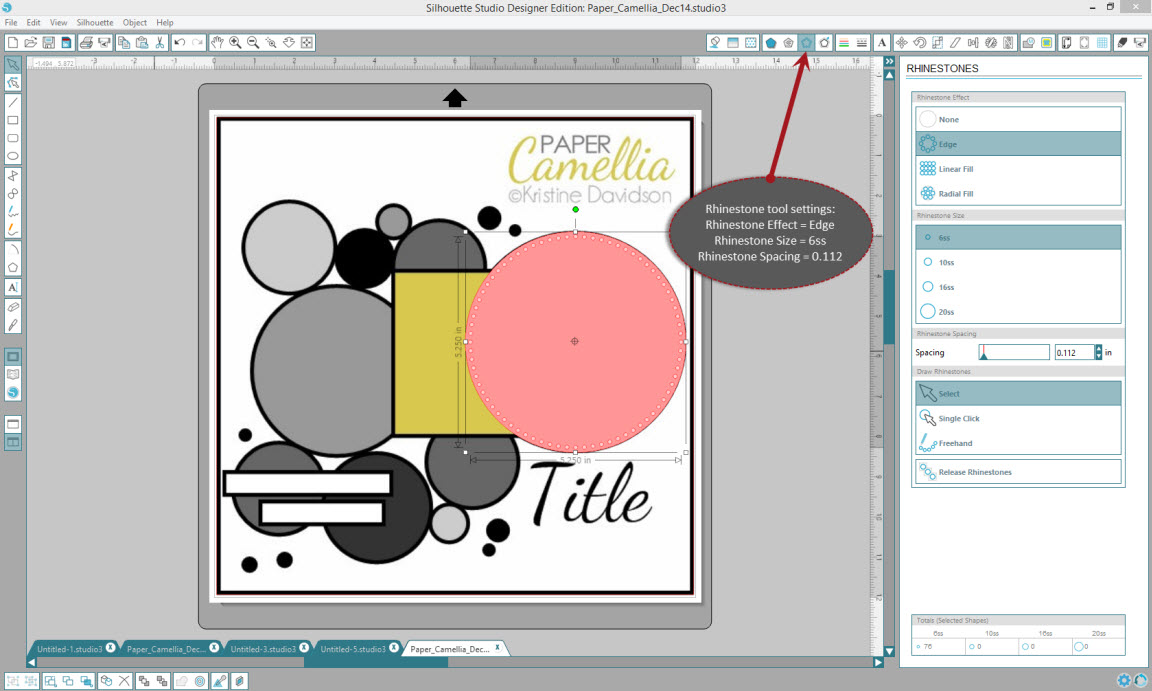
Step 4: Step 4: Rhinestone tool settings: Rhinestone Effect = Edge; Rhinestone Size = 6ss; Rhinestone Spacing = 0.112
Cut out the shape(s) and crochet!
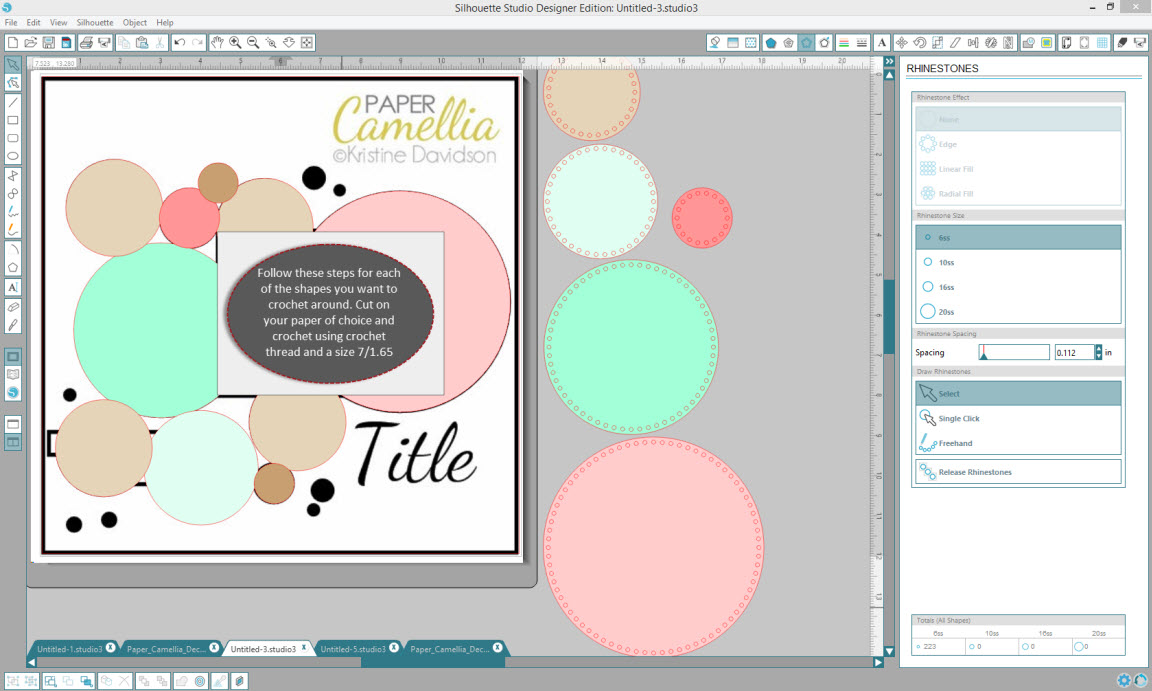
Step 5: Follow these steps for each of the shapes you want to crochet around. Cut on your paper of choice and crochet using crochet thread and a size 7/1.65 mm hook.
Product/technique notes
The patterned paper I used is from Crate Paper’s “Close Knit” 6×6 paper pad. I also used my Silhouette to design and cut my title.
I really hope you will try this technique on a page of your own (and that it’s fun for you)! If you do, will you leave a comment with a link to your page because I would LOVE to see it.
Leave a Reply