• Skip to primary navigation
  • Skip to main content
  • Skip to primary sidebar
  • Skip to secondary sidebar
  • Home
  • About me

The Constant Scrapper

If I'm not scrapbooking I'm thinking about scrapbooking!

American Crafts

My kind of bouquet

July 20, 2011 By Janice Daquila-Pardo Leave a Comment

Twisted Sketches has revealed its latest sketch, #111, and the twist is “buttons.” Be sure to head over to the site to grab the sketch, then create something and link it up! 🙂

Twisted Sketches #111

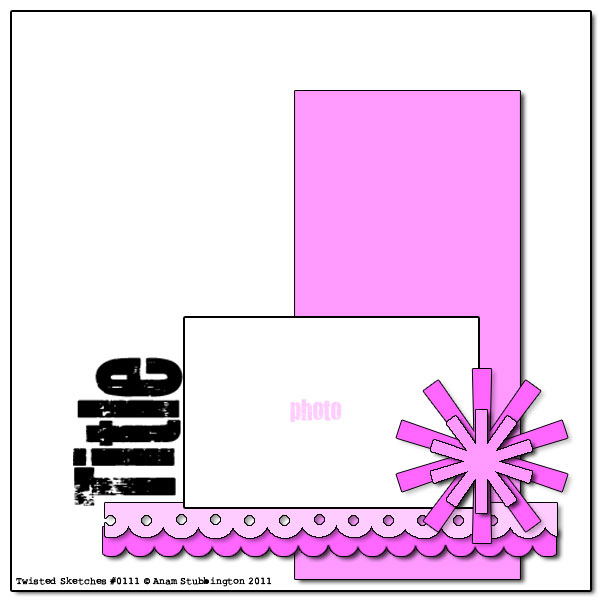
Here’s my Design Team layout inspired by the sketch. The patterned papers I used on this very colorful layout are from American Crafts’ Margarita line.

Bouquet_Daquila-Pardo

My darling man brought home a bouquet of Copic markers for me "just because." He's a keeper!

The journaling on my page reads: “Matt came home from work on Thursday and said, ‘I got something for you; it’s on the table.’ It was a bag full of Copic markers! I was so surprised…and excited…and touched. What an amazing thing to do just because.”

I cut that 3×3 envelope with my Silhouette and added it so that I could tuck in a thank you card to Matt (my way of including a more personal thank you to my generous and thoughtful honey). It’s the first thing I’ve ever made using Copics. And so my new obsession begins. 🙂

This hydrangea card was made using my new Copic markers.

Filed Under: Cards, Layouts based on sketches, My scrapbook layouts, Sketches Tagged With: 1 photo, American Crafts, border punches, color, Copic coloring, emotional journaling, October Afternoon, one-page layouts, Silhouette, stamping, Twisted Sketches

7 tips for packing for your next crop

July 19, 2011 By Janice Daquila-Pardo 4 Comments

The first time I went away for a weekend crop with a friend in 2003, I about lost my mind while I was packing for it. I kept running from pile to pile in my craft room, sure that I would “need” some of everything. In the end, I filled the back of my SUV with scrapbook products. I took so much more that I could have possibly needed. I felt overburdened with stuff to lug around and overwhelmed with choices; it just about paralyzed my creativity that weekend!

These days I crop monthly with a few friends at my neighborhood Archiver’s. After our first outing together I realized that the only way I could look forward to these get-togethers on a monthly basis was if I stressed a lot less about the packing. I have a little system now that works quite well for me, and while I was packing for this weekend’s crop I thought I would take a few photos to share with you (as well as the resulting layout at the end of the post).

Tip 1: Pack a limited number of photos

My first big tip is to choose the photos you want to work with ahead of time. That way you can pack products only for those photos. I know we all have tons of photos we need to scrap, but if we take several stacks of photos along we have to try to pack products that could go with all of them. So for my six-hour night of scrapping I start my process by selecting photos for just four or five layouts. I hardly ever get even that many done!

Tip 2: Plan each layout on paper (or in your head)

I start all my layouts with sketches. It’s just how I get down. So for each set of photos I choose a sketch to go with them. This quickly leads me to the product-choice part of my process because I know how many patterned papers and embellishments I’ll need. If you don’t use sketches when you create, try to envision a rough draft of your final layout so that you can pull products from your stash that will work together.

Tip 3: Pull all the products you might need for each project/layout

I look through my stash with sketch and photos in hand and pull products that I like together. Even if I see something that could work for one of my other layouts, I try to focus on one page plan at a time. I’ve fallen into the trap of packing for all the projects at once, a little here and a little there, but it just makes it take longer to pack in the end.

Pull together your products

Tip 4: Create a page kit for each layout

Put everything that’s flat enough to fit into a 12×12 envelope. I just put it all in this one place so I don’t have to dig through my bag for it or remember what I had thought would work well together. That kit is done, so I can move on to the next.

Create a page kit

Tip 5: Pack the bulky items and tools

After I’ve packed my separate page kits, I pull together all the tools and extras that I’ll need. There are the constants—like my Basic Grey magnetic mat, paper trimmer, bin of patterned paper scraps, etc. And there are also things that I think I’ll want to use with the page kits but that won’t fit in the envelopes. This includes things like punches, bags of buttons, etc. I pile that all into my rolling organizer (one that I purchased at Costco years ago and still love).

Pack the bulky items last

Tip 6: Grab your tool bag

I keep my small-stuff tool bag packed all the time. It sits next to my craft desk, so it’s always in use and ready to go. So, that’s the last step—grab the tool bag and get out that door!

Grab your tool bag

This process of mine takes a little more planning, but it saves me so much packing angst! I kid you not, there’s a woman who sometimes crops on the same night I meet my friends who wheels in a big flatbed cart chockablock full of scrapbook supplies! The time and backache involved in packing that way…well, I’ll just say it’s not for me. I prefer to walk in pulling my little cart and carrying my tool bag. I’ll tell you what, I usually still have more supplies than I need for a night of fun scrapping.

Bonus tip 7: Share

Another way to really cut down on what you pack is to plan on sharing. If your friend always brings her die-cutting machine, offer to bring your dies to share with her each time in exchange for the use of her machine. Or perhaps you have a great collection of punches that you can share, and your buddies can bring their circle cutters or Crop-A-Diles. You get the idea.

I thought after all that, I should share the layout I made with the page kit shown above. 🙂

Prof_Daquila-Pardo

My baby bro after a day of teaching.

Filed Under: 12x12 layouts using 6x6 paper, My scrapbook layouts, Tips Tagged With: 1 photo, American Crafts, border punches, one-page layouts, scrapbook tips, stamping

PageMaps’ My Little Shoebox sketch contest

June 13, 2011 By Janice Daquila-Pardo 4 Comments

Every once in a while I run across a sketch that really makes me yearn to pull together some photos and products and get scrapping. This PageMaps sketch had that effect on me when I saw it on their blog. It’s their June contest sketch, and I knew I wanted to play along.

jun1112x12e

PageMaps June 2011 sketch for contest

A few of the reasons I like this sketch so much and can see using it again are that it features four photos (so you can really tell a story with them), calls for a few nice pops of patterned paper and still leaves a good amount of white space for the eyes to rest a bit while looking at it. It accomplishes a lot in a 12×12 canvas!

This is the layout I created based on the sketch. The photos are from Memorial Day weekend, just a few weeks ago. When Matt and I started talking about the kinds of things we could do during the holiday weekend, Matt suggested, “We could drive to Fredericksburg for the day so you can go to that scrapbook store you like.”

Proof_Daquila-Pardo

Here is my entry for the PageMaps June 2011 sketch contest.

Now if that’s not proof of love, I don’t know what is. 🙂

Filed Under: 12x12 layouts using 6x6 paper, Layouts based on sketches, My scrapbook layouts, Sketches Tagged With: 4 photos, American Crafts, Basic Grey, Echo Park, Making Memories, My Mind's Eye, one-page layouts, Spellbinders, Technique Tuesday, The Paper Studio

Don’t stop me now ’cause I’m having such a good time!

May 25, 2011 By Janice Daquila-Pardo 6 Comments

Today sketch #103 has gone up at the Twisted Sketches site. The twist for this one is “stop.”

twistedsketches_103

Twisted Sketch #103

Here’s what I put together based on that sketch (click the image for a larger view):

Don'tStopMe3_Daquila-Pardo

Sing my title to the tune "Don't stop me now" by Queen

When I thought of the twist for this sketch I immediately heard Queen’s “Don’t stop me now.” It’s one of those songs that always makes me smile. I love the racing pace and fun feeling of it.

So I used that as my title for this layout, which features me and my younger bro, Phil, back in 1992. We’re out front of our home in Willoughby, Ohio, with Spenser (who was just a little over a year old), ready to head out on a bike ride. It’s a simple memory—for I don’t remember our route or how long we rode or what we talked about on the ride—but I love that I can capture evidence of our family home, our precious dog, a healthy hobby and our close sibling relationship all in one shot.

Filed Under: Layouts based on sketches, My scrapbook layouts, Sketches Tagged With: 1 photo, American Crafts, border punches, Jillibean Soup, one-page layouts, Silhouette, Twisted Sketches, vintage photos

How can you resist?

April 27, 2011 By Janice Daquila-Pardo 7 Comments

Twisted Sketches launches its 98th sketch today, and the twist this time is “paint.” The sketch and the design team’s interpretations are awaiting you at Twisted Sketches’ site…and here is my design team contribution using the new sketch:

We'llDoLunch_Daquila-Pardo

That's me, wearing Daddy's clip-on sunglasses and enjoying the Ohio sunshine.

This is the sketch:

6a00d83451d2c069e20147e3cc26c9970b-800wi

Twisted Sketch #98 calls for 2 photos

For the “paint” twist I was inspired to try a resist technique on the talk bubble using white shimmer paint. I have done resist techniques with ink and embossing powder before but had not yet tried paint resist, so I thought I would show a quick step-by-step just in case it might inspire you to try it on a future layout.

  1. Gather your supplies: Acrylic paint, rubber stamp, Distress Inks and foam applicators.

    PaintResistSupplies

    This technique doesn't take much in the way of supplies.

  2. Apply paint (shimmer paint in my example) to the stamp image and stamp it carefully (don’t smear it) on a spare bit of cardstock.
  3. Immediately take your rubber stamp to a sink and clean it well with soap and water. It’s best not to let the acrylic paint dry on the stamp as it may be harder to remove.
  4. If you’re patient wait until the paint thoroughly dries. If not, hit it with your heat tool for a minute or two.
  5. Start applying the Distress Inks with a circular motion and blend your colors a little where they meet. I used the three colors shown in the photo, but of course there are no rules about how many you use.
  6. Slightly mist a paper towel with water and gently buff off the extra ink from the painted areas to reveal the true color!

Here is a close-up of the final effect. I think I like it!

CloseUp

This close-up photo shows how the shimmer paint resisted the inks.

If you decide to try this quick technique after reading my post, have your people call my people please leave a comment and a link so I can see what you’ve done!

Filed Under: Layouts based on sketches, My scrapbook layouts, Sketches, Tutorials Tagged With: 2 photos, American Crafts, Basic Grey, Blogging for Scrapbookers class, border punches, October Afternoon, one-page layouts, Silhouette, stamping, tutorial, Twisted Sketches, vintage photos

« Previous Page
Next Page »

Primary Sidebar

Thanks for visiting!

Hi, I'm Janice.

Follow me

Follow on Bloglovin

My sketches on Pinterest

Design team

I am a proud Stuck?! Sketches designer!

Past design teams

Scrap & Music sketch designer

Creative Scrappers sketch designer

Sketches With a Twist sketch designer

Sketchabilities design team

Twisted Sketches design team

Secondary Sidebar

Topic categories

  • 12×12 layouts using 6×6 paper
  • Cards
  • Freebies/giveaways
  • Layouts based on sketches
  • Layouts using 3×4 journaling cards
  • My scrapbook layouts
  • Reviews
  • Scrapbook products
  • Sketches
    • My sketches
  • That redo that you do
  • Tips
  • Tutorials
  • Uncategorized

Archives

Tags

1 photo 2 photos 3 photos 4 photos American Crafts banner Basic Grey Bella Blvd Blogtoberfest border punches cards Christmas Copic coloring Crate Paper Creative Scrappers Echo Park emotional journaling Fancy Pants Halloween hand stitching Jillibean Soup Little Yellow Bicycle Making Memories Martha Stewart Crafts My Mind's Eye October Afternoon one-page layouts Pebbles Pink Paislee rosette Scrap & Music sketches scrapbook philosophy Silhouette Simple Stories Sketches with a Twist Sketch Support Spellbinders stamping Stuck?! Sketches Tim Holtz Distress Ink tutorial Twisted Sketches two-page layouts vintage photos We R Memory Keepers

Copyright © 2010-2018 The Constant Scrapper