• Skip to primary navigation
  • Skip to main content
  • Skip to primary sidebar
  • Skip to secondary sidebar
  • Home
  • About me

The Constant Scrapper

If I'm not scrapbooking I'm thinking about scrapbooking!

Blogtoberfest

Beer logos as design inspiration

October 21, 2011 By Janice Daquila-Pardo Leave a Comment

Celebrate Blogtoberfest with me all month!

Blogtoberfest Day 21

According to Wikipedia, Oktoberfest is a 16–18 day beer festival held annually in Munich, Bavaria, Germany, running from late September to the first weekend in October. It is one of the most famous events in Germany and is the world’s largest fair, with more than 5 million people attending every year. The Oktoberfest is an important part of Bavarian culture, having been held since 1810. Other cities across the world also hold Oktoberfest celebrations, modeled after the Munich event.

Well, I could not celebrate Blogtoberfest without beer, so Matt and I went out for happy hour today in honor of my blog readers! 🙂 And we had the most wonderful pumpkin beer!

I am like many of you who love the pumpkin-flavored offerings of fall—pumpkin lattes, pumpkin scones, pumpkin milkshakes, pumpkin cookies, pumpkin ice cream, pumpkin bread, pumpkin cheesecake, pumpkin pancakes, pumpkin soup. I may sound a little like Bubba from Forrest Gump, but I can’t get enough of the flavor of pumpkin!

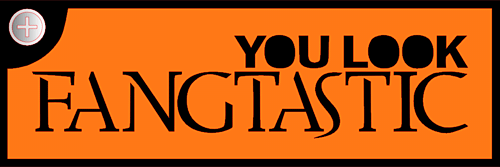
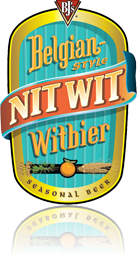
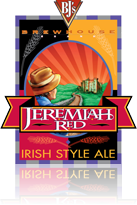
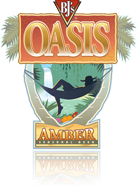
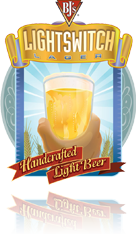
As Matt and I sat enjoying the gourd-flavored fruits of the brewer’s labors, I noticed the logo on the glass. It’s design really appealed to me.
BJ's Pumpkin Ale logo

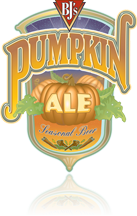
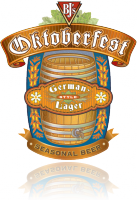
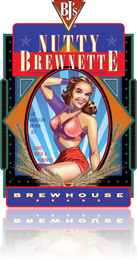
Then we started looking around the restaurant at their other beers’ logos, which they had displayed on the walls. They all followed this same style, but each had its own distinct focus/feel. I started imagining how I could incorporate some of this style into a layout or at least an embellishment for a layout (WHAT, doesn’t everyone do that while out for a beer?). And then it hit me that these logos might inspire others as well.

So here are just a few of the BJ’s beer logos that I liked. What can you see incorporating into a future layout or card? The shapes. The layering. The colors. The title treatments. I hope you have fun drawing inspiration from these, and happy Friday!

BJ's Oktoberfest logo BJ's Nutty Brewnette logo BJ's Nit Wit logo
BJ's Jeremiah Red logo BJ's Oasis Amber logo BJ's Lightswitch Lager logo

Filed Under: Uncategorized Tagged With: Blogtoberfest

“You look fangtastic” freebie

October 20, 2011 By Janice Daquila-Pardo Leave a Comment

Celebrate Blogtoberfest with me all month!

Blogtoberfest Day 20

To celebrate Blogtoberfest today I have created a freebie for you! I know a lot of us have Silhouette digital cutters, so if you do this freebie is for you. It can be used as a layout title or a card front. If you would like to have this cut file, which includes all the pieces to create the image you see below, please just leave me a comment to let me know and I will email it to you. 🙂

You look fangtastic cut file freebie

Filed Under: Freebies/giveaways Tagged With: Blogtoberfest, Halloween, Silhouette

So grateful for rain

October 19, 2011 By Janice Daquila-Pardo 5 Comments

Celebrate Blogtoberfest with me all month!

Blogtoberfest Day 19

The layout I’m sharing today is based on a sketch provided at sketch challenge site, Sketchy Thursdays. This challenge is open until Saturday, October 22nd, so you can still play along! In addition to following the provided sketch, we had to journal about what we’re thankful for and include at least five leaves on the page (as a photo, patterned paper, stamps, die cuts, etc.).

GratefulForRain_Daquila-Pardo

After 13 months of drought, the rain we had last week was a blessing.

The sketch and the journaling prompt worked together so well for me this time. I immediately thought of how thankful I was for our recent rainstorms. And with that thought in mind, the sketch stopped looking like strips of patterned paper to me and more like raindrops falling down the page. The journaling reads, “I am thankful daily for my family, my love, my health, my God and my home. But after 13 months of drought in Austin, I am particularly grateful for RAIN.”

The background paper I chose represents the parched earth that surrounds us. The patterned paper “raindrops” reflect the colors in the photo of the leaves in the puddle. And a little Glossy Accents on the word RAIN in the title reflects the blessed moisture. We certainly didn’t get enough rain to pull us out of our drought, but we’ll take every drop with gratitude.

Filed Under: Layouts based on sketches, My scrapbook layouts Tagged With: 1 photo, Blogtoberfest, Making Memories, one-page layouts, Silhouette, stamping

Rosette pumpkin tutorial

October 18, 2011 By Janice Daquila-Pardo 10 Comments

Celebrate Blogtoberfest with me all month!

Blogtoberfest Day 18

I was in Archiver’s about a month ago looking at new scrapbook products and saw a pretty 3D pumpkin they had made. The store was out of the printed instructions for it, so I took a good look at the sample and came home to try my hand at recreating it. Here is what I produced and what I learned along the way.

Completed 3D pumpkin project

Gather your supplies: cardstock, adhesive, hot glue gun, scoring board, stamps and inks

Rather than use printed patterned paper for this I wanted to create my own with cardstock and stamps. For one thing, I really don’t use this technique very often, and I wanted to stretch myself creatively. Second, I wasn’t at all sure how many pieces of paper the pumpkin would take to finish (it ended up being 5), so I thought it would be a good idea to be able to make more as I needed it. I have amassed quite a collection of doily stamps since that trend began (but haven’t used them as much as I’d like), so I decided to pull them all out for this project. I selected a number of beautiful distress ink colors and set to work creating my patterns. Aren’t those doilies yummy?

pumpkin1

Cover your cardstock with stamped images.

This pumpkin is made of stacked rosettes, so I knew I would be doing a lot of scoring. To save myself time I scored each whole 12×12 piece of paper at one time (every half inch) and then cut it into strips. To make this stack into a sphere shape requires making rosettes of graduating sizes. I have listed all the strip sizes below. Each rosette is made with 2 strips of equal width, so cut 2 of each size.

pumpkin2

Score the whole 12x12 page at once before cutting the strips you need.

Number and size of paper strips needed to complete the pumpkin rosettes

Strip width # Strips # Rosettes
2 inches 2 1 (for the bottom of the stack)
2-1/4 inches 4 2
2-1/2 inches 4 2
2-3/4 inches 4 2
2-7/8 inches 4 2
3 inches 2 2

Accordion fold all strips and create your rosettes. I figure that rosettes are so common in paper crafting these days that many of us have made them before, so I’m not including instructions for that part of this project. However, there are probably hundreds of tutorials out there on how to make these little beauties—both in video form and still photo/text—if you haven’t yet tried your hand at them.

pumpkin3

Cut all your various strips and accordion fold them.

Once you have a stack of rosettes, apply hot glue to the center disk of cardstock on each one and adhere them together. Start with the smallest rosette and stack gradually larger circles until you’ve used the largest one, and then start decreasing again. Once you’ve used all your rosettes, you’ll have your base pumpkin shape completed! Here is the order to follow:

  1. Bottom of the stack: 2-inch rosette
  2. Next up: 2-1/4 inch
  3. 2-1/2 inch
  4. 2-3/4 inch
  5. 2-7/8 inch
  6. 3 inch
  7. 2-7/8 inch
  8. 2-3/4 inch
  9. 2-1/2 inch
  10. Top rosette: 2-1/4 inch. I preferred to leave off a top 2-inch rosette to avoid making my pumpkin look too much like a pineapple!
pumpkin4

Stack the rosettes to create the pumpkin shape.

Cut two 1-1/2-inch strips of paper for your pumpkin’s stem. Apply wet glue to one side of the cardstock and start rolling it into a tight cylinder. When you’re about to the end of the first strip, slide in the second and keep rolling. Wrap rubber bands around the roll until it dries.

pumpkin5

Apply glue to 2 long strips of cardstock and roll them tightly.

Now it’s time to add some flair to the stem. Cut another 1-1/2-inch strip of the same paper and snip fringe along its entire length. To make sure that I had enough room to apply my glue to the bottom of the strip, I drew a line to guide my fringe cutting. Then wrap the fringe around the bottom of the stem. Bend, curl and primp that fringe until it suits you.

pumpkin6

Cut one more 1-1/2-inch strip of paper to use for the fringe.

I used my Silhouette to cut some maple leaf shapes. To add texture I ran them through a crimper then spritzed them with a few colors of Glimmer Mist. Pretty!

pumpkin7

I cut out some maples leaves, ran them through a crimper and misted them.

Add the leaves (I used three) with glue dots. I also cut some very thin strips of paper, curled them and glued those at the top center.

pumpkin8

Use glue dots to add leaves and curly-ques to the top of the pumpkin.

Use hot glue to secure the stem to the base. You’re finished! And you have a beautiful fall decoration to add to your home. 🙂

pumpkin9

Once you add your leaves and stem, your pumpkin is complete!

It occurs to me that one last step that could really add a lot to our little pumpkin is to spritz it with a few hits of pearl Glimmer Mist. I may still do that to mine!

You know that if you make one of these I need to see it. Please leave me a comment with a link to your version. I really enjoyed making this little guy, and I hope you’ll give it a try.

Filed Under: Tutorials Tagged With: Blogtoberfest, Inkadinkado, My Mind's Eye, rosette, stamping, tutorial

The farmer’s market experience

October 17, 2011 By Janice Daquila-Pardo Leave a Comment

Celebrate Blogtoberfest with me all month!

Blogtoberfest Day 17

I created the layout below based on a sketch provided at the Pencil Lines blog because I wanted to spotlight these beautiful photos I took at our Austin Farmer’s Market this month.

FarmGrown_Daquila-Pardo

It means a lot to us to support local farmers, especially in light of Texas' drought.

What is it about going to the farmer’s market on a Saturday morning?

  • We have to get up early on the weekend to get the best selection.
  • We have to drive several miles farther than the one-mile trip to our regular grocery store.
  • We have to pay for parking.
  • We have to be satisfied with whatever selection the farmers bring to town that day.
  • And we sometimes have to pay more for our purchases.

So, if it’s such a pain to go to the local farmer’s market, why do so many of us do it?

  • Perhaps because being out early on a Saturday morning feels like you’re really starting your weekend right—getting a jump on your to-do list (if, like me, you live by your lists, even especially on the weekends).
  • Or it’s that driving farther just to buy fresh produce makes it feel like an outing—a fun little jaunt you’re making with your partner or partners in crime, hot coffee in hand and hopes high for what you’ll find at the end of your drive.
  • I’ll admit that it’s more difficult to put a positive spin on having to pay for parking… but what if paying that fee makes you feel good about supporting your city’s economy?
  • And if you’re “stuck” with whatever the farmers bring, you’ll always be eating seasonally! By shopping at the local farmers market, what you get is fresh and ripe. This is a great way to increase your overall health because food that is picked before it has ripened suffers from decreased vitality.
  • You can find a variety of fresh, organic produce at more affordable prices than in a supermarket. Not to mention the fact that even if you’re spending a little more, you’re paying it to a fellow human being who lives and gives locally instead of to some massive agribusiness.
  • Shopping in the fresh morning air and talking to some of the people who grow these fruits and vegetables can really provide you with a deeper connection to and appreciation for your food and the nutrients you derive from them.
  • Last but not least, ripe and seasonal produce and flowers are gorgeous! They’re masterpieces. I’m sorry to say, but food just doesn’t look that good at SuperTarget.

So, if you’ve never been to one, or it’s been a long time since you last visited, I urge you to get thee to a farmer’s market. It’s such a satisfying experience!

Filed Under: Layouts based on sketches, My scrapbook layouts Tagged With: 3 photos, Blogtoberfest, border punches, Crate Paper, Making Memories, one-page layouts, Spellbinders

« Previous Page
Next Page »

Primary Sidebar

Thanks for visiting!

Hi, I'm Janice.

Follow me

Follow on Bloglovin

My sketches on Pinterest

Design team

I am a proud Stuck?! Sketches designer!

Past design teams

Scrap & Music sketch designer

Creative Scrappers sketch designer

Sketches With a Twist sketch designer

Sketchabilities design team

Twisted Sketches design team

Secondary Sidebar

Topic categories

  • 12×12 layouts using 6×6 paper
  • Cards
  • Freebies/giveaways
  • Layouts based on sketches
  • Layouts using 3×4 journaling cards
  • My scrapbook layouts
  • Reviews
  • Scrapbook products
  • Sketches
    • My sketches
  • That redo that you do
  • Tips
  • Tutorials
  • Uncategorized

Archives

Tags

1 photo 2 photos 3 photos 4 photos American Crafts banner Basic Grey Bella Blvd Blogtoberfest border punches cards Christmas Copic coloring Crate Paper Creative Scrappers Echo Park emotional journaling Fancy Pants Halloween hand stitching Jillibean Soup Little Yellow Bicycle Making Memories Martha Stewart Crafts My Mind's Eye October Afternoon one-page layouts Pebbles Pink Paislee rosette Scrap & Music sketches scrapbook philosophy Silhouette Simple Stories Sketches with a Twist Sketch Support Spellbinders stamping Stuck?! Sketches Tim Holtz Distress Ink tutorial Twisted Sketches two-page layouts vintage photos We R Memory Keepers

Copyright © 2010-2018 The Constant Scrapper