• Skip to primary navigation
  • Skip to main content
  • Skip to primary sidebar
  • Skip to secondary sidebar
  • Home
  • About me

The Constant Scrapper

If I'm not scrapbooking I'm thinking about scrapbooking!

Silhouette

You’ll shoot your eye out

December 12, 2014 By Janice Daquila-Pardo Leave a Comment

You'llShootYourEyeOut_Daquila-Pardo

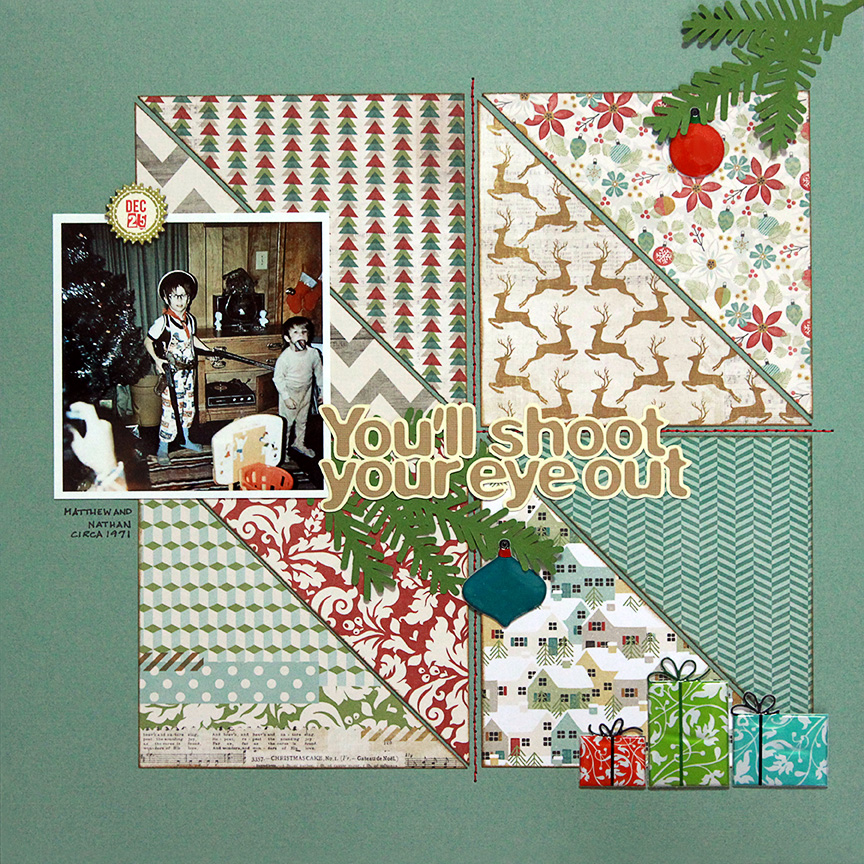
Does this photo make you think of Ralphie from “A Christmas Story” (1983)?

Yeah, me too.

Ralphie: I want an official Red Ryder, carbine action, two-hundred shot range model air rifle!
Mrs. Parker: No, you’ll shoot your eye out.

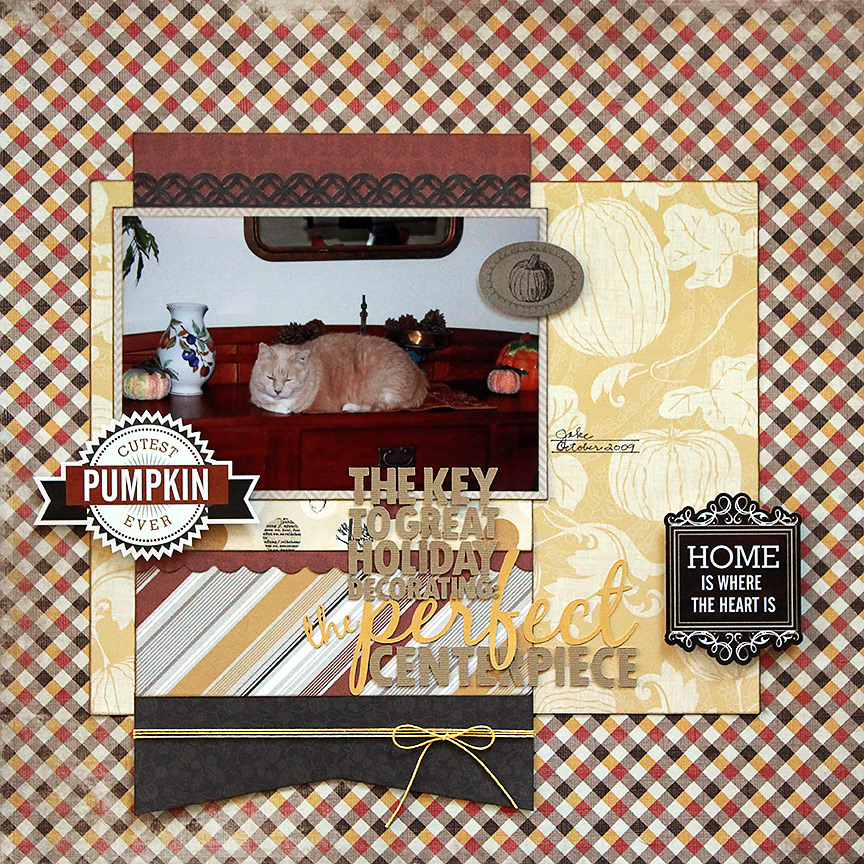
This photo was taken on Christmas morning circa 1971. My husband, at about the age of four, is the one gloriously outfitted in his new cowboy gear from Santa Claus. I really don’t have a clue what his younger brother, Nate, is doing. LOL!

I dare ya not to hear this title in the sing-song voices of the characters from the movie. I double-DOG-dare ya.

Product/technique notes

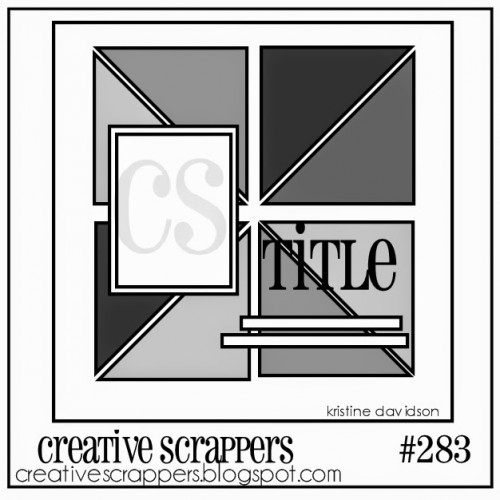
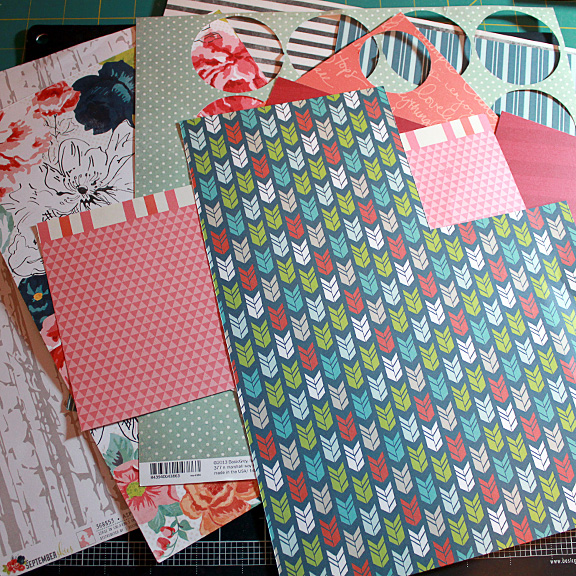
I followed the Creative Scrappers sketch below for this page because I really liked the idea that my patterned paper areas would look a lot like presents. The papers are from Pink Paislee’s “Snow Village” 6×6 pad. The colors and vintage feel of this line matched so well with that photo! And the puffy stickers are from SEI. I designed the title and cut it on the Cameo, and the pine branches are part of a Silhouette cut file.
Creative Scrappers 283

Filed Under: 12x12 layouts using 6x6 paper, My scrapbook layouts, Sketches Tagged With: 1 photo, Christmas, hand stitching, one-page layouts, Silhouette, vintage photos

Nailed it!

November 28, 2014 By Janice Daquila-Pardo 2 Comments

NailedIt_Daquila-Pardo

Have you seen the hilarious images online that show a perfect Martha-Stewartesque project alongside someone else’s wonky attempt to recreate it, labeled with just the words “Nailed it?”

lambNailedIt

Today’s layout tells my own “nailed it” story.

It was the Thanksgiving of 1994—our first since moving to Chapel Hill, NC—and my 28th birthday. Mom and Dad were hosting the holiday, which included Aunt Mary Lou and Earl from Pennsylvania in addition to our family of four. Just days before turkey day Mom had the brilliant idea of holding a pie-baking contest between Phil and me, which was a clever way of getting out of baking the desserts herself. 😉

The gauntlet had been thrown down. Tensions were high as the two of us went to work looking up recipes and making shopping lists for our entries in the contest. Phil decided to go with the always popular (and a bit too obvious, in my opinion) pumpkin pie, while I fearlessly chose to try a new-to-me recipe for peach chiffon pie. I felt confident but nervous.

Aunt Mary Lou and Earl arrived. Everyone was excitedly catching up and in the good spirits of the holiday. Phil had already baked his contest pie, and it was my turn.

Now, those of you who only know me online won’t really understand unless I tell you just how much I like to talk. I am a TALKER. So while I was putting together the all-important pie crust, Aunt Mary Lou parked herself just to the end of the counter where I was working, and we talked. A lot.

I suspect that chemists don’t chat while they’re mixing chemicals, but that’s just a hunch born of my experience on that fateful Thanksgiving Day. At the very least I can conclude that were I a chemist, I should keep my mouth shut while measuring ingredients for my experiments. Are you picking up what I’m putting down here?

I put my crust in to bake and began the task of mixing the silky, sweet, peachy filling—which would be added to the crust and then baked again. At the appointed time I checked on my crust, but I was surprised to find that it hadn’t browned. At all. So I gave it a little more time. But extra time and high temperatures had no effect on the color of my crust. I finally shrugged off this bump in the road, took the pale crust out of the oven, added the filling and popped it back in for its second round of baking.

My confidence at taking home the blue ribbon remained unshaken at this point.

Fast forward to the end of the day’s feast. To a bit of fanfare Mom brought out the ballots and explained to the judges the categories upon which they should score the entries (appearance 10%, filling & crust 40% and overall flavor 50%). Phil and I were asked to cut and serve our pies after the judges had been given the opportunity to rate the appearance of each. Once everyone at the table had been served, the room quieted for the first bites.

My nerves did not allow me to take a taste right away; I was more interested in watching for the reactions of the judges. So I didn’t immediately understand why the room remained eerily quiet as they all chewed. Earl’s face reddened noticeably. Mom and Dad shot questioning glances at each other. Phil choked and spat out his mouthful. And Spenser the schnauzer hid under the couch after willingly taking the bit of crust Earl had offered him. But it was Aunt Mary Lou who finally broke the silence by blurting an expletive. And then pandemonium reigned. Everyone gagged and gasped and shouted over each other. They laughed. And laughed some more. I was crestfallen but finally took a tiny bite of my own pie. Oh myyy.

I had obviously switched the measurements for the salt with the sugar. The extra salt had kept the crust from browning on the first baking. And then it leached up into the peach chiffon filling during the second baking. What a fiasco—but a very funny one.

Of course, Phil won the contest. Whatever. He can have the blue ribbon. Because I have the honor of being the reason for one of the funniest family stories we have. To this day we still refer to that year as our Salt Pie Thanksgiving.

NAILED IT!

Product/technique notes

I followed sketch 281 from Creative Scrappers and mainly used products from October Afternoon’s “Apple Cider” line. I created my title using the Silhouette and used several stickers from the Carta Bella “Homemade with Love” kit.
Creative Scrappers 281

Note: I’m submitting this to the Paper Issues Let Me Espresso My Gratitude link party.

Filed Under: Layouts based on sketches, My scrapbook layouts Tagged With: 1 photo, October Afternoon, one-page layouts, Silhouette, vintage photos

The key to great holiday decorating: The perfect centerpiece

November 26, 2014 By Janice Daquila-Pardo 3 Comments

PerfectCenterpiece_Daquila-Pardo

For a three-legged cat, Jake certainly knows how to get where he wants to go. In this case, I guess he wanted to be in the middle of my fall decorations!

He really is the cutest pumpkin ever, isn’t he?

I decided to scrap this photo during the week of Thanksgiving because it reminds me of how thankful we are for our pets. They love to be with us. They’re such good companions. They make us laugh. And they keep us from focusing too much on ourselves.

They’re our babies, and I’m ever so grateful to have them in our lives.

Product/technique notes

Most of the products I used on this were from Echo Park’s “Reflections: Fall” collection, with the addition of a few pieces of paper from way back in the day. That butter-colored pumpkin paper is an oldie from Paper Salon. I followed the inspiration of this November sketch from Stuck?! Sketches:
StuckNovember15

Filed Under: Layouts based on sketches, My scrapbook layouts Tagged With: 1 photo, border punches, Echo Park, one-page layouts, Silhouette

Birthday sleepover

November 24, 2014 By Janice Daquila-Pardo Leave a Comment

BirthdaySleepover_Daquila-Pardo

We all have certain techniques that especially catch our eye when they’re used on a layout, and for me paper folding is one of them.

I seem unable to pass up a closer look at a page with folds! So to add a little extra dimension and personality to my page I incorporated a faux quilting folding technique into my design. If you want to see more details about creating this look, I have a tutorial in an older post for a layout that uses the same technique.

For my 11th birthday in 1977 Mom and Dad let me have a slumber party with a few friends: Jill Trzaska, Renee Poplik and Margaret Wissman. One of my fun memories from this night is when we performed a song-and-dance routine for my family (bottom photo). We called ourselves “The Oreos” because of the plastic Oreo party favor necklaces we all wore. Pretty clever, eh?

Product/technique notes

The products on this page all came from the November Back Porch Memories kit and are from American Crafts’ “Shimelle” line. I created the title on the Silhouette and designed it to incorporate the record die cut from the kit as the O.

Note: I’m submitting this to the Paper Issues “Let’s Get This Party Star-ted and Par-ty Hear-ty” link party.

Paper Issues: My project was featured

Filed Under: My scrapbook layouts Tagged With: 2 photos, American Crafts, border punches, hand stitching, one-page layouts, paper folding, Silhouette, vintage photos

Using patterned paper strips to create a colorful silhouetted wall hanging

November 20, 2014 By Janice Daquila-Pardo Leave a Comment

SilhouetteWallHanging_TheConstantScrapper

Once I had completed layouts with all the patterned paper in this month’s Back Porch Memories kit, I used the scraps to create something pretty for our home. Here’s how I turned my offcuts into a colorful seasonal wall hanging.

The tutorial

Daquila-PardoTutorial1

My final project will be 8×8 inches, so I started by cutting down a sheet of cardstock to that size. This will be the base for my design. Then gather all the patterned paper remnants together.

Daquila-PardoTutorial2

Cut 3-4 ¼-inch strips from each.

Daquila-PardoTutorial3

Apply your adhesive of choice (I used a tape runner) liberally to the base. Begin laying down strips on the diagonal, butting each snugly against the last so there’s no cardstock showing through.

Daquila-PardoTutorial4

Fill the whole base with strips. Cut off the excess.

Daquila-PardoTutorial5

Cut out your chosen overlay design from black cardstock, either with a digital die cutter or by hand. For my project I chose a fall-themed design from the Silhouette store, sized it to 7.25 inches and centered it within an 8-inch square before cutting. I suggest the design you choose should both work well as a silhouette and fill a good bit of your square. That way lots of the patterned paper can show through.

Daquila-PardoTutorial6

Adhere the silhouette to the patterned paper (I used repositionable adhesive so I can change out the design later). If there are any inner pieces to the design, as there were in mine (under the maple leaf, down the centers of the side leaves and on the acorn), adhere those as well so that the design “makes sense” to the eye.

What I think is so great about this project is that it allows you to use scraps of paper that you love in a completely new way, but it doesn’t use very much of it so you still have lots left for making cards, mini albums or cards for your pocket scrapbooks—however you usually put your scraps to work.

I can also see myself using this as a go-to seasonal home decoration. I can either cut out a different silhouette design and lay it over these same strips or use scraps from another kit to create a new background as well!

Filed Under: Tutorials Tagged With: Guest design, Silhouette

« Previous Page
Next Page »

Primary Sidebar

Thanks for visiting!

Hi, I'm Janice.

Follow me

Follow on Bloglovin

My sketches on Pinterest

Design team

I am a proud Stuck?! Sketches designer!

Past design teams

Scrap & Music sketch designer

Creative Scrappers sketch designer

Sketches With a Twist sketch designer

Sketchabilities design team

Twisted Sketches design team

Secondary Sidebar

Topic categories

  • 12×12 layouts using 6×6 paper
  • Cards
  • Freebies/giveaways
  • Layouts based on sketches
  • Layouts using 3×4 journaling cards
  • My scrapbook layouts
  • Reviews
  • Scrapbook products
  • Sketches
    • My sketches
  • That redo that you do
  • Tips
  • Tutorials
  • Uncategorized

Archives

Tags

1 photo 2 photos 3 photos 4 photos American Crafts banner Basic Grey Bella Blvd Blogtoberfest border punches cards Christmas Copic coloring Crate Paper Creative Scrappers Echo Park emotional journaling Fancy Pants Halloween hand stitching Jillibean Soup Little Yellow Bicycle Making Memories Martha Stewart Crafts My Mind's Eye October Afternoon one-page layouts Pebbles Pink Paislee rosette Scrap & Music sketches scrapbook philosophy Silhouette Simple Stories Sketches with a Twist Sketch Support Spellbinders stamping Stuck?! Sketches Tim Holtz Distress Ink tutorial Twisted Sketches two-page layouts vintage photos We R Memory Keepers

Copyright © 2010-2018 The Constant Scrapper