• Skip to primary navigation
  • Skip to main content
  • Skip to primary sidebar
  • Skip to secondary sidebar
  • Home
  • About me

The Constant Scrapper

If I'm not scrapbooking I'm thinking about scrapbooking!

2 photos

Celebrating National Donut Day my way

June 3, 2011 By Janice Daquila-Pardo Leave a Comment

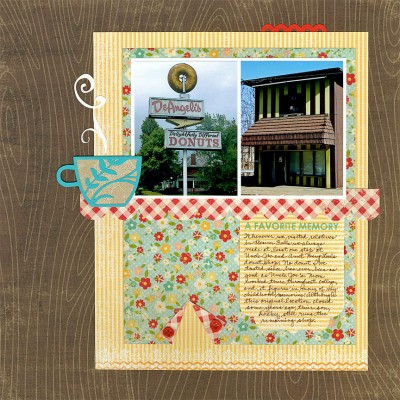
I heard several times today (through Twitter and on the radio) that it was National Donut Day. Who knew? Frankly, I had never heard of this special day before, but it was obviously promoted quite well this year. Well, I decided to forgo the free donut at participating donut shops and celebrate in my own way…with a layout!

My parents met in a little college town in Pennsylvania called Beaver Falls. My mother had moved there from California to attend college and lived with her Aunt Mary Lou, Uncle Joe and their three little boys. To earn her keep she worked at their donut shop, which was just down the block from their home and just a short walk from the campus. It was a perfect situation, and she loved living and working with them.

When my parents got married and had me and my brother, they moved to Ohio. But we visited all the Beaver Falls relatives very often (I would guess about monthly). One of the most fun parts of visiting was going down the street to the donut shop. Uncle Joe made wonderful donuts and cream puffs (my favorite), and all the regular customers were very sweet to Phil and me as we sipped hot chocolate, ate pastries and twirled incessantly on the stools at the counter.

And so, on this special national holiday 😉 I created a layout to commemorate another sweet part of my childhood.

DeAngelisDonuts_Daquila-Pardo

DeAngelis' Delightfully Different Donuts

In case you want to read the journaling and can’t: Whenever we visited relatives in Beaver Falls we always made at least one stop at Uncle Joe and Aunt Mary Lou’s donut shop. No donut I’ve tasted since has ever been as good as Uncle Joe’s. Mom worked there throughout college, and it figures in many of my childhood memories. Although this original location closed some years ago, their son, Dicky, still runs the remaining shop.
Filed Under: My scrapbook layouts Tagged With: 2 photos, border punches, emotional journaling, one-page layouts, Silhouette, stamping, vintage photos

How can you resist?

April 27, 2011 By Janice Daquila-Pardo 7 Comments

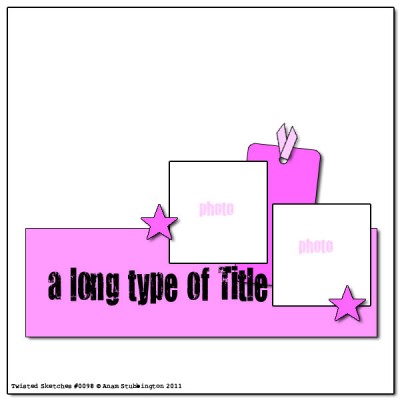
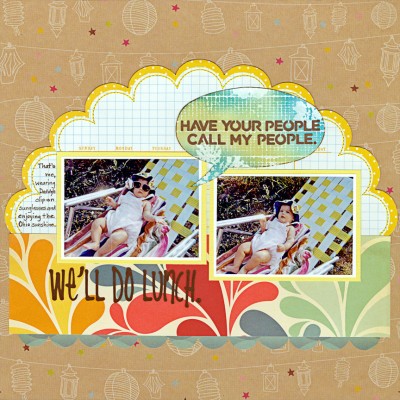
Twisted Sketches launches its 98th sketch today, and the twist this time is “paint.” The sketch and the design team’s interpretations are awaiting you at Twisted Sketches’ site…and here is my design team contribution using the new sketch:

We'llDoLunch_Daquila-Pardo

That's me, wearing Daddy's clip-on sunglasses and enjoying the Ohio sunshine.

This is the sketch:

6a00d83451d2c069e20147e3cc26c9970b-800wi

Twisted Sketch #98 calls for 2 photos

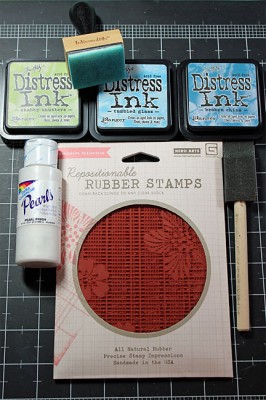
For the “paint” twist I was inspired to try a resist technique on the talk bubble using white shimmer paint. I have done resist techniques with ink and embossing powder before but had not yet tried paint resist, so I thought I would show a quick step-by-step just in case it might inspire you to try it on a future layout.

  1. Gather your supplies: Acrylic paint, rubber stamp, Distress Inks and foam applicators.

    PaintResistSupplies

    This technique doesn't take much in the way of supplies.

  2. Apply paint (shimmer paint in my example) to the stamp image and stamp it carefully (don’t smear it) on a spare bit of cardstock.
  3. Immediately take your rubber stamp to a sink and clean it well with soap and water. It’s best not to let the acrylic paint dry on the stamp as it may be harder to remove.
  4. If you’re patient wait until the paint thoroughly dries. If not, hit it with your heat tool for a minute or two.
  5. Start applying the Distress Inks with a circular motion and blend your colors a little where they meet. I used the three colors shown in the photo, but of course there are no rules about how many you use.
  6. Slightly mist a paper towel with water and gently buff off the extra ink from the painted areas to reveal the true color!

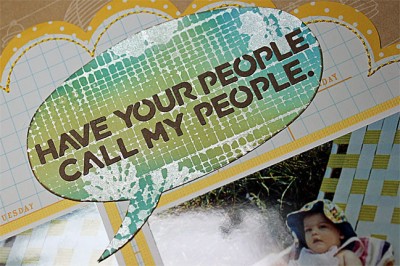
Here is a close-up of the final effect. I think I like it!

CloseUp

This close-up photo shows how the shimmer paint resisted the inks.

If you decide to try this quick technique after reading my post, have your people call my people please leave a comment and a link so I can see what you’ve done!

Filed Under: Layouts based on sketches, My scrapbook layouts, Sketches, Tutorials Tagged With: 2 photos, American Crafts, Basic Grey, Blogging for Scrapbookers class, border punches, October Afternoon, one-page layouts, Silhouette, stamping, tutorial, Twisted Sketches, vintage photos

Spanning a score of years

April 19, 2011 By Janice Daquila-Pardo Leave a Comment

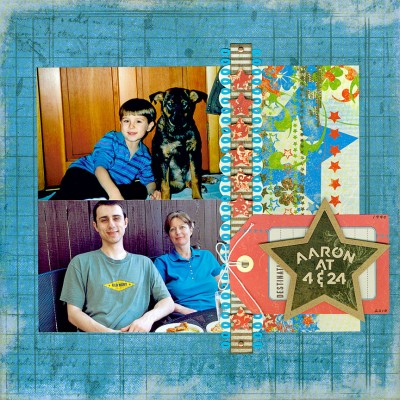
I really appreciate the layouts I see that compare people at different times in their life. So I pulled out two photos of Matt’s nephew, Aaron, at the ages of 4 and 24 and got to work on a layout to compare them.

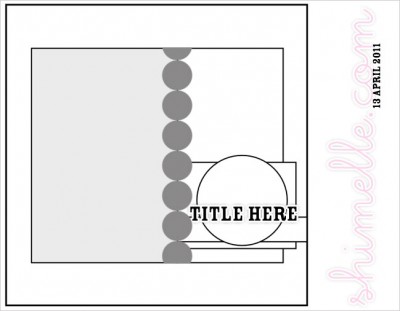
The hardest part about this layout for me was finding products that would work well for both times in a boy’s life. But once I did, the sketch I found on shimelle.com helped it all come together. Following is the resulting layout as well as the sketch.

Aaron4&24_JDaquila-Pardo

Aaron at 4 & 24: A boy grows into a man

The sketch calls for one large or two smaller photos and lots of attention on the border.

Filed Under: Layouts based on sketches, My scrapbook layouts Tagged With: 2 photos, border punches, one-page layouts, Spellbinders, vintage photos

This freeze-frame moment

March 2, 2011 By Janice Daquila-Pardo 1 Comment

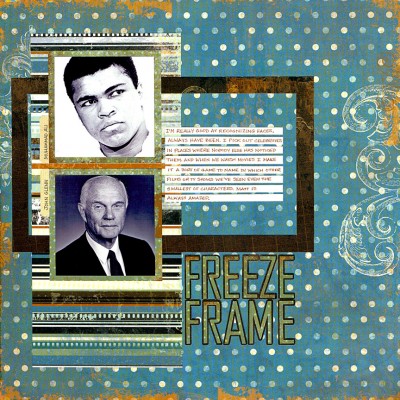
Sketch #90 is now live at the Twisted Sketches blog. For this fun sketch “frame” was the twist. Here’s my interpretation:

FreezeFrame_JDaquila-Pardo

Because I'm really good at faces I've picked out many celebrities in situations where nobody else noticed them.

The journaling on this layout may be hard to read: “I’m really good at recognizing faces. Always have been. I pick out celebrities in places where nobody else has noticed them. And when we watch movies I make it a sort of game to name in which other films or TV shows we’ve seen even the smallest of characters. Matt is always amazed.”

As usual there’s more to this story than I could fit on this layout. The fact is that since I was young I have been very quick to recognize a face if I have ever seen it before. For instance, when I was 9 years old (in 1976) my family, who was flying to California to visit my grandparents, was at the Cleveland airport. We were walking through the terminal when I recognized a man using a pay phone along the opposite wall and told my dad, “That’s Muhammad Ali.” My father didn’t at all think it was him, but I insisted. So we went closer. When we were just several feet away my dad finally agreed that it was the boxing legend. I was too shy to ask for his autograph, so my brother took a pen and our airline ticket envelope over to the man with the phone under his chin and got his signature. Phil has that autograph to this day, which I repeatedly tell him I deserve to have because I was the one who recognized Mr. Ali in the first place! Are you reading this, Phil?

Years later I recognized astronaut and senator John Glenn walking alone out to an airport parking lot. I was traveling with my husband and brother, and Mr. Glenn passed us as we were heading toward the terminal. Matt and Phil had no idea that we had just walked right past a living legend, but I will never forget that moment.

Over the years I have honed these skills so that now I almost instantly recognize/can name actors in shows we watch, no matter where or when I’ve seen them before (and often no matter how little of their faces I can see). Matt loves to pull up the Internet Movie Database to check my work. This little game has become part of the entertainment for us.

Filed Under: Layouts based on sketches, My scrapbook layouts Tagged With: 2 photos, one-page layouts, Twisted Sketches

How to use a movie poster as scrapbook inspiration

February 21, 2011 By Janice Daquila-Pardo Leave a Comment

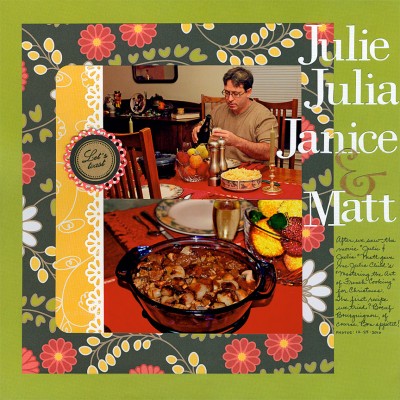
After seeing the movie “Julie & Julia” in 2009—which intertwines the story of Julia Child’s start in the cooking profession with blogger Julie Powell’s challenge to cook all the recipes in Child’s first book—I received Julia Child’s “Mastering the Art of French Cooking” for Christmas. There’s a scene in the movie where Julie Powell has to cook dinner for a special guest and chooses to make Boeuf Bourguignon. Matt and I decided that would be the first dish we would try.

Let me tell you, you don’t just make Boeuf Bourguignon one day after work. This recipe takes several hours and requires some special ingredients that most of us don’t normally keep in our pantries. In our house when we undertake a project like that, we take photos.

My process

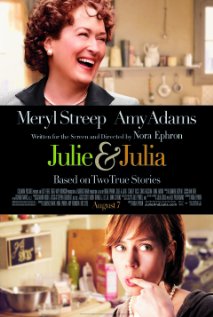
Julie & Julia movie posterWhen I was ready to scrap these photos I already knew what I wanted to title my layout. So I decided to look to the movie art for inspiration. First I looked up “Julie & Julia” on IMDB and thought the title treatment on the movie poster was something I could work with. I could cut out the title with my Silhouette, but what were those fonts?
So I searched on “what fonts are used on julie & julia poster?” and the most helpful result I found was on FontFeed. This site identified the two fonts used as Didot for the words Julie/Julia and Bernhard Modern for the ampersand. The problem was that I didn’t have either of those fonts, and I couldn’t find them on any free font sites.

Then I did another search for “fonts similar to Didot” and found identifont.com, where you can find lists of fonts that are similar to the one you’re looking for. Following this site’s recommendations I found replacement fonts within those that I already owned and I was able to go to town setting up my cut files in the Silhouette Studio software.

I decided to base my color scheme on the movie poster as well. Black and green factor heavily in what makes this poster pop, so I tried to use those colors. I found the perfect paper in my stash that combined the black and green from the poster as well as the red and gold in my photos. From all that came this layout. Bon appetit!

Julie&Julia3_JDaquila-Pardo

Filed Under: My scrapbook layouts, Tips, Tutorials Tagged With: 2 photos, American Crafts, border punches, Martha Stewart Crafts, one-page layouts, scrapbook tips, Silhouette, Spellbinders, stamping

« Previous Page
Next Page »

Primary Sidebar

Thanks for visiting!

Hi, I'm Janice.

Follow me

Follow on Bloglovin

My sketches on Pinterest

Design team

I am a proud Stuck?! Sketches designer!

Past design teams

Scrap & Music sketch designer

Creative Scrappers sketch designer

Sketches With a Twist sketch designer

Sketchabilities design team

Twisted Sketches design team

Secondary Sidebar

Topic categories

  • 12×12 layouts using 6×6 paper
  • Cards
  • Freebies/giveaways
  • Layouts based on sketches
  • Layouts using 3×4 journaling cards
  • My scrapbook layouts
  • Reviews
  • Scrapbook products
  • Sketches
    • My sketches
  • That redo that you do
  • Tips
  • Tutorials
  • Uncategorized

Archives

Tags

1 photo 2 photos 3 photos 4 photos American Crafts banner Basic Grey Bella Blvd Blogtoberfest border punches cards Christmas Copic coloring Crate Paper Creative Scrappers Echo Park emotional journaling Fancy Pants Halloween hand stitching Jillibean Soup Little Yellow Bicycle Making Memories Martha Stewart Crafts My Mind's Eye October Afternoon one-page layouts Pebbles Pink Paislee rosette Scrap & Music sketches scrapbook philosophy Silhouette Simple Stories Sketches with a Twist Sketch Support Spellbinders stamping Stuck?! Sketches Tim Holtz Distress Ink tutorial Twisted Sketches two-page layouts vintage photos We R Memory Keepers

Copyright © 2010-2018 The Constant Scrapper