

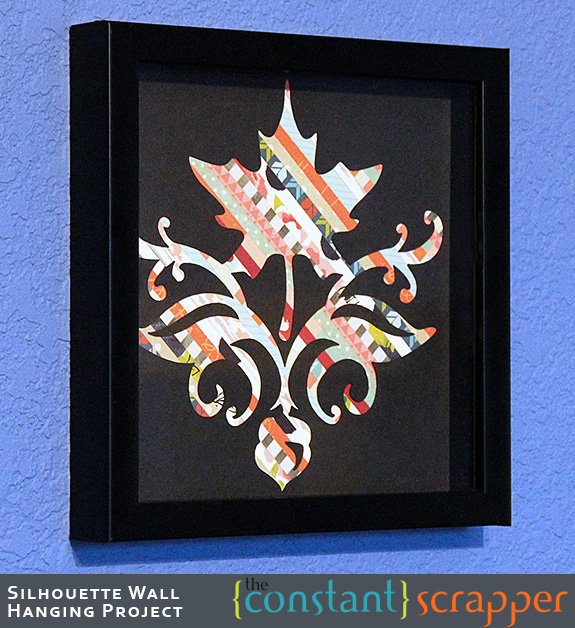
Once I had completed layouts with all the patterned paper in this month’s Back Porch Memories kit, I used the scraps to create something pretty for our home. Here’s how I turned my offcuts into a colorful seasonal wall hanging.
The tutorial
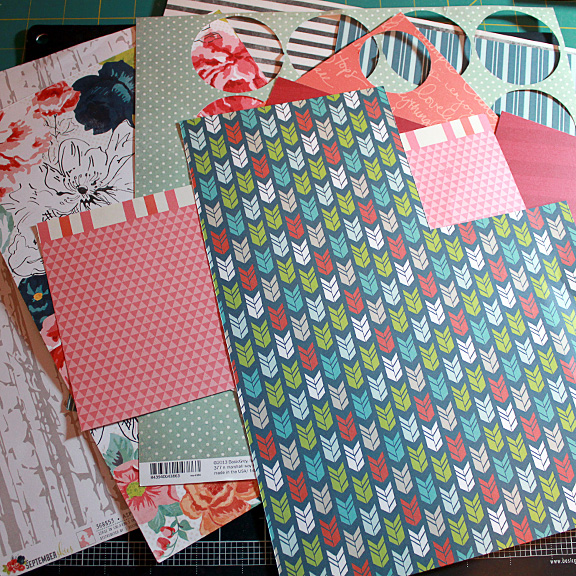
My final project will be 8×8 inches, so I started by cutting down a sheet of cardstock to that size. This will be the base for my design. Then gather all the patterned paper remnants together.
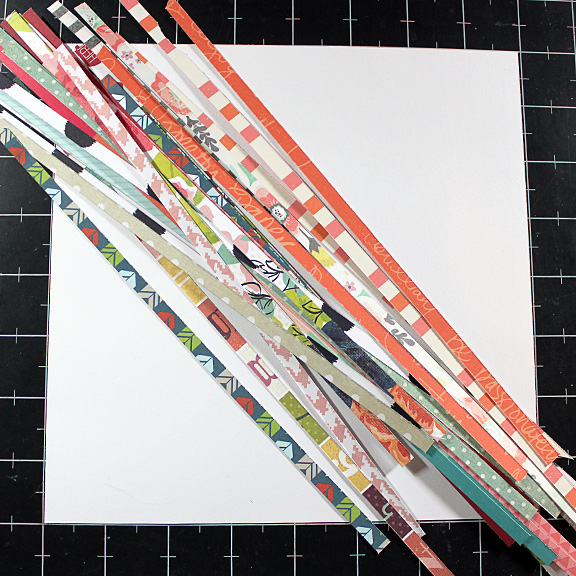
Cut 3-4 ¼-inch strips from each.
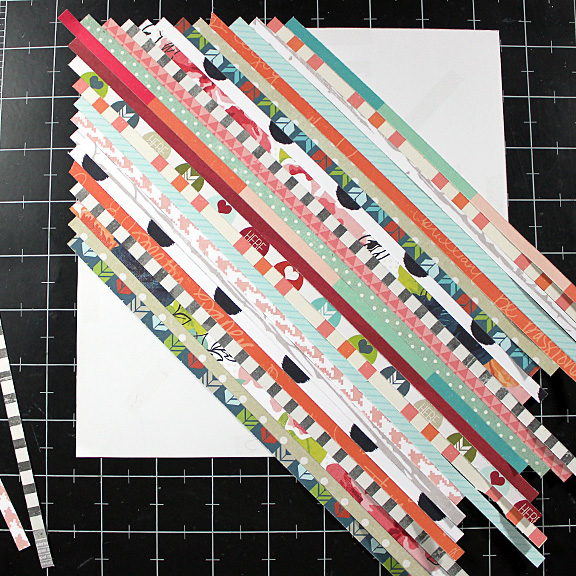
Apply your adhesive of choice (I used a tape runner) liberally to the base. Begin laying down strips on the diagonal, butting each snugly against the last so there’s no cardstock showing through.
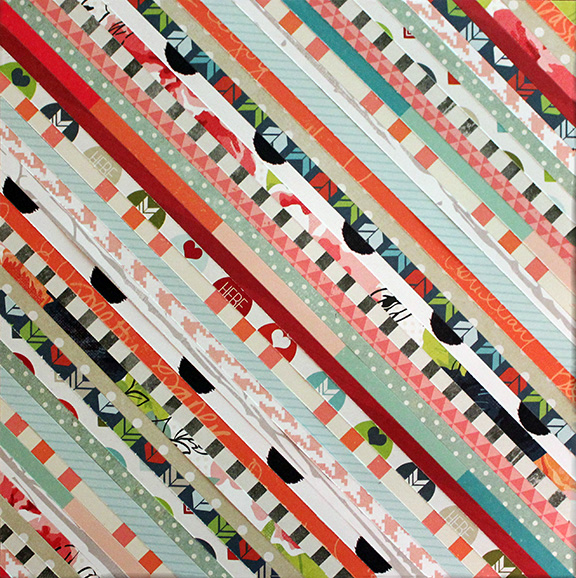
Fill the whole base with strips. Cut off the excess.

Cut out your chosen overlay design from black cardstock, either with a digital die cutter or by hand. For my project I chose a fall-themed design from the Silhouette store, sized it to 7.25 inches and centered it within an 8-inch square before cutting. I suggest the design you choose should both work well as a silhouette and fill a good bit of your square. That way lots of the patterned paper can show through.
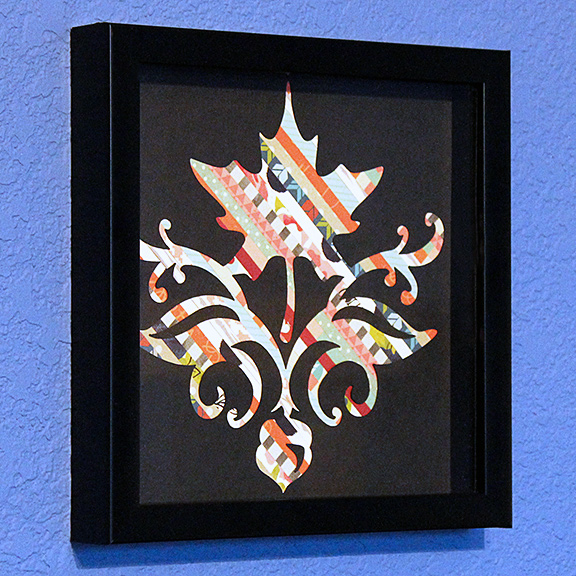
Adhere the silhouette to the patterned paper (I used repositionable adhesive so I can change out the design later). If there are any inner pieces to the design, as there were in mine (under the maple leaf, down the centers of the side leaves and on the acorn), adhere those as well so that the design “makes sense” to the eye.
What I think is so great about this project is that it allows you to use scraps of paper that you love in a completely new way, but it doesn’t use very much of it so you still have lots left for making cards, mini albums or cards for your pocket scrapbooks—however you usually put your scraps to work.
I can also see myself using this as a go-to seasonal home decoration. I can either cut out a different silhouette design and lay it over these same strips or use scraps from another kit to create a new background as well!
Leave a Reply