

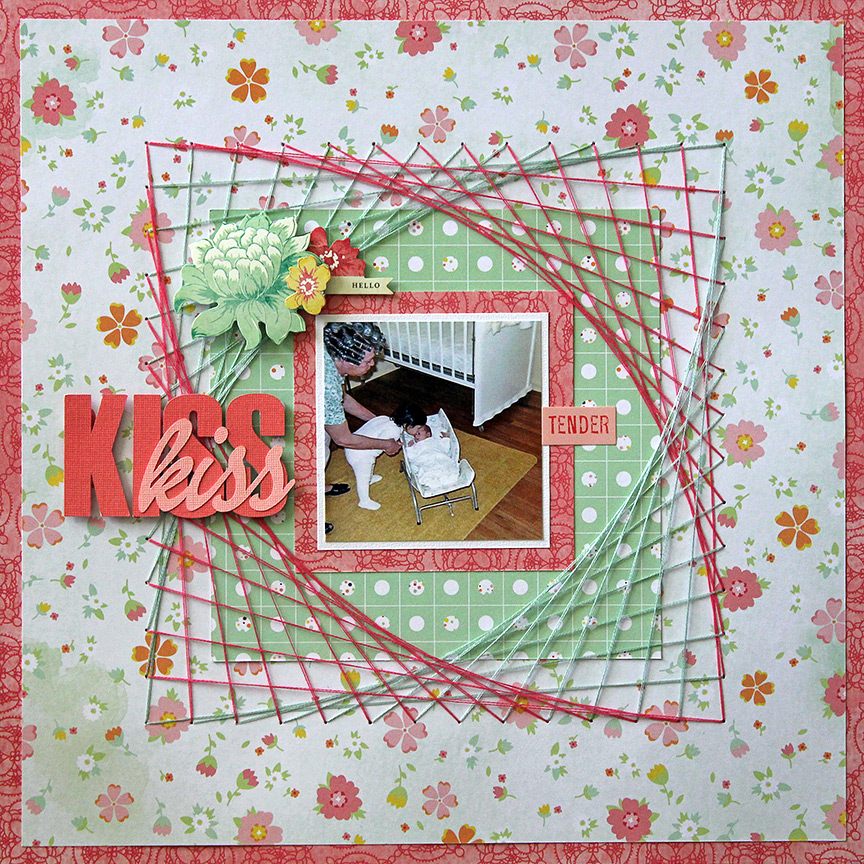
I’m so excited about today’s project because 1) I tried something new and 2) liked how it turned out, so 3) I want to share the idea with you! Do you remember doing string art projects as a kid? That’s what I incorporated on my layout as a frame for my small photo of Grandma helping me kiss my brand new brother in January 1968. Mom says I called him “B” (for baby).
My thought process
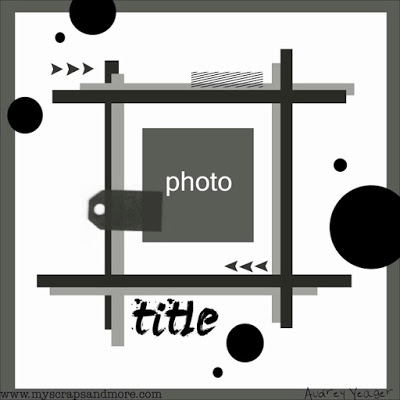
This idea came to me because of a sketch (as most of my scrappy ideas do). I was referencing this My Scraps and More sketch below, and I started thinking about how I wanted to create the central “tic-tac-toe” area of the page. I ticked off my options (get it?): strips of patterned paper, strips of washi tape, strips of ribbon, lines of stitching. Lines of stitching made me picture creating an elaborate hand stitched grid area to frame the photo. And then it hit me: string art!
I went to Pinterest and perused other artists’ string art in search of some ideas for making a square frame (as represented in the sketch). After successfully incorporating this technique into my page design, I thought I should share my process in case you like the look as much as I do.
String art tutorial
After deciding to make the string art area take up 8×8 inches in the center of the 12×12 page, I created a quick template for myself in my Silhouette Designer software. If you have a Silhouette and want to recreate this, draw an 8×8 square, center it on the page, open the rhinestones window and follow the settings below. If you don’t have a cutting machine, just measure and mark equidistant holes (perhaps 1/2 inch apart) with a ruler.
I cut out my simple template on a scrap piece of paper, lined it up over my background paper and poked the holes. Then the fun began!
I double matted the 3×3 photo with white cardstock and patterned paper so it would pop better off the background. Then I mounted that onto another pattern that was 6.25 square. Following the numbering system in the diagram below (up at 1, down at 2, up at 3, down at 4, etc.), I stitched away with two colors of embroidery thread to create the four corners of my square frame.

I do hope this tutorial was helpful to you. If you decide to try this technique on a page, I would LOVE to see it, so please come back and leave me a comment on this post. I will leave you kindly comments in return, I promise!
Wow! This is amazing! Love it! Thanks for joining us at My Scraps & More Sketches!
I love how your string art turned out! Isn’t that great when something you try turns out as you envisioned or even better? What a sweet photo too. So glad you joined us again at My Scraps & More sketches!!
So cool! Love the string art frame! Thanks for joining us at My Scraps and More sketches
Wow – this is so cool! I love how you did this! And what a precious photo! Thanks for playing with MSAM Sketches!